Restoring a 1962 Jaguar E-Type

May 11, 2008

The Three Amigos

Filed under: Uncategorized — Penforhire @ 1:04 pm

One of the problems with having a public blog like this and having co-workers follow it is the hard time they give me at work. “What have you done for me lately?” That’s okay, it’s another incentive to keep moving ahead.

By the way, I’m dabbling in the stock market with intended future Jag funds. I’ve never been an active market investor so I’m learning a lot. Jim Cramer is my new best friend. Brad, overhearing Gary teaching me a few things, suggested a three month fantasy stock challenge with some arbitrary constraints. We’ve got five guys in it, including Gary and Bob. Now I fully expect Gary and Bob to leave my picks in the dust. Or at least I wouldn’t be embarassed to be schooled by them. Brad decided to replicate the monkey-throwing-darts technique. So for his picks he blindly dropped a pen onto a Wall Street Journal spread on his desk.

Here’s the problem. After the first week his dart-throwing monkey picks are kicking my ass. So please e-mail me your illicit insider information. It’s a good cause and … good enough for Martha Stewart, good enough for me!

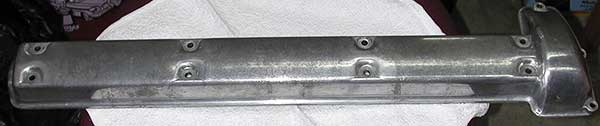
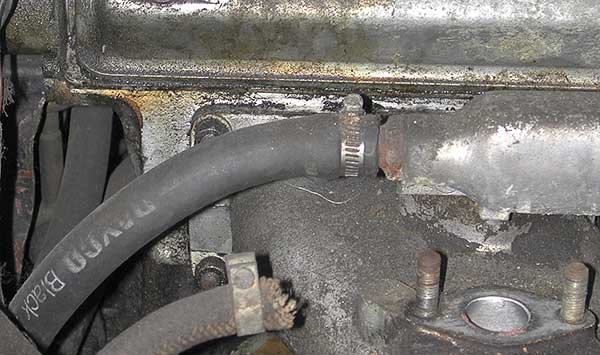
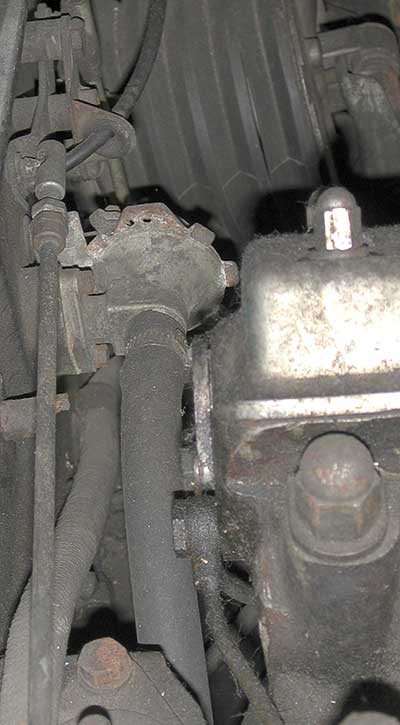
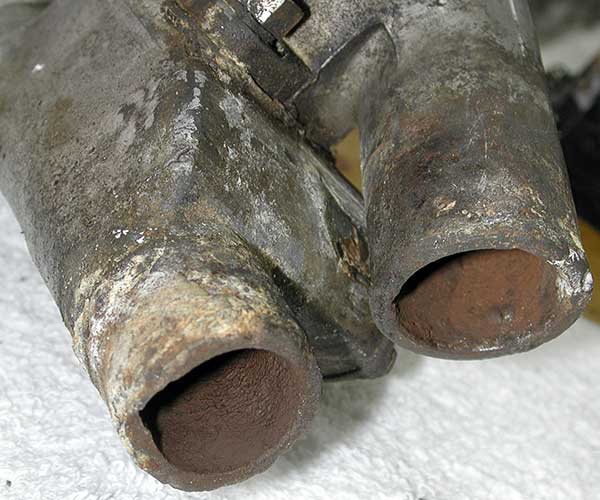
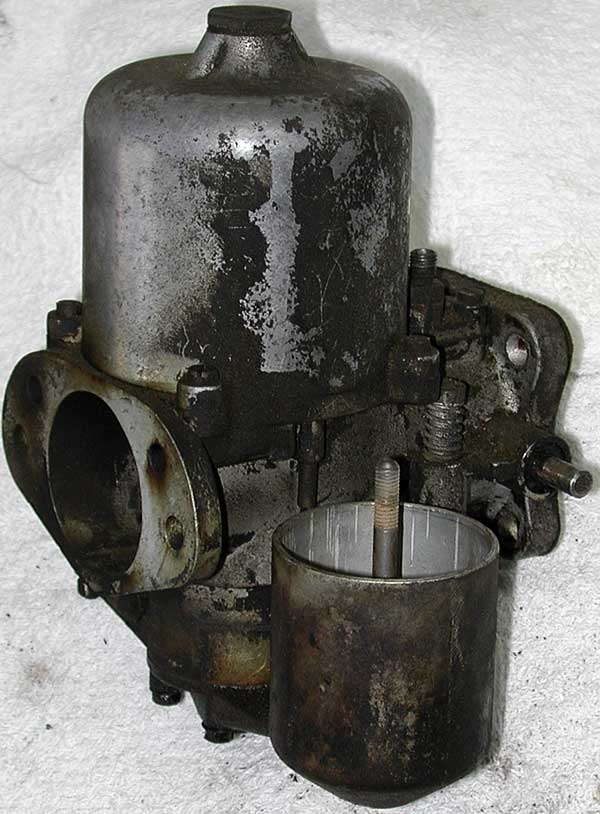
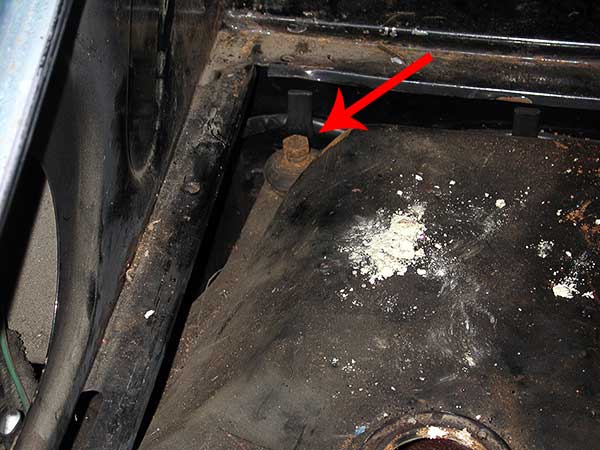
That Verizon FIOS install went smooth as a baby’s butt. The internet sure is snappier at 5/2 MPS speed. I didn’t want to make a polishing racket while the installer dude was here. Maybe I’d be able to hear him falling off the roof. So I didn’t finish the valve cover. I started rebuilding the SU HD8 carbs instead. Move valve cover polishing next time, I promise. I know you want it.

I’m getting smart. Well, smarter anyway. Here I am, wearing my personal protective gear for polishing.

Ready to rock and roll. That’s a dust mask, face shield, and ear plugs. The polishing motor is pretty loud. Technically those are isolating ear phones going to an Ipod so I can be mellow while I polish. Polishing debris still gets everywhere but this seems like a reasonable compromise.

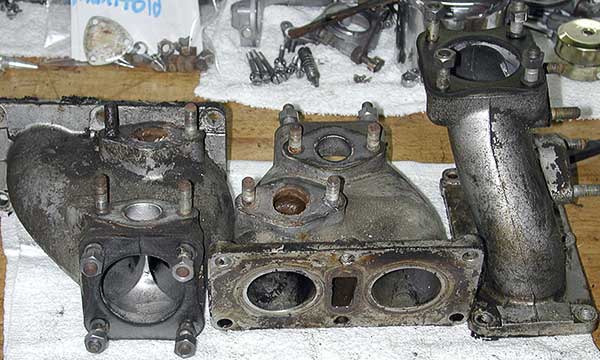
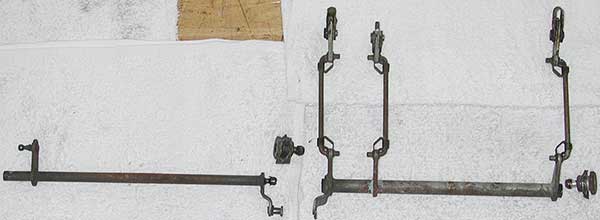
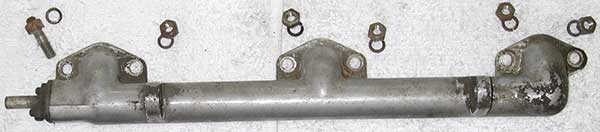
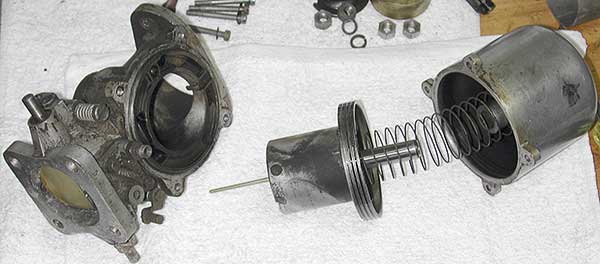
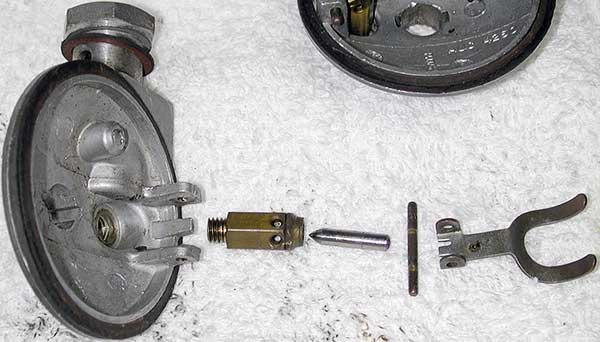
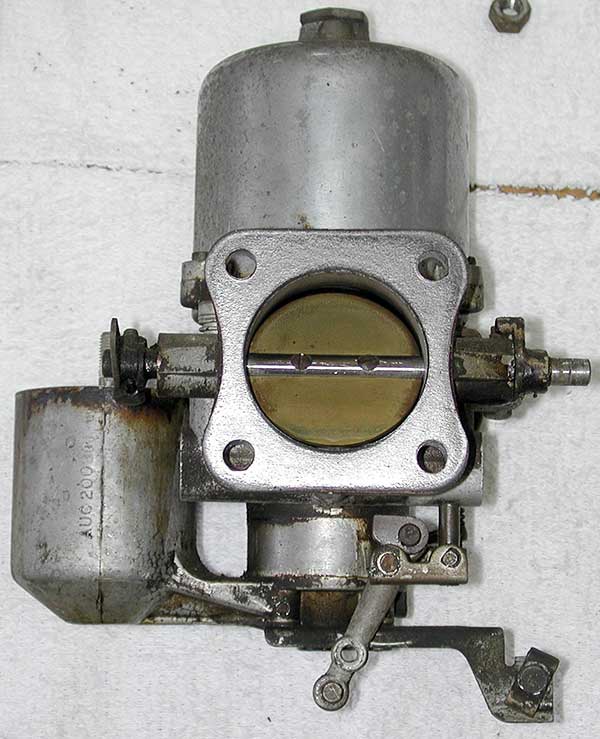
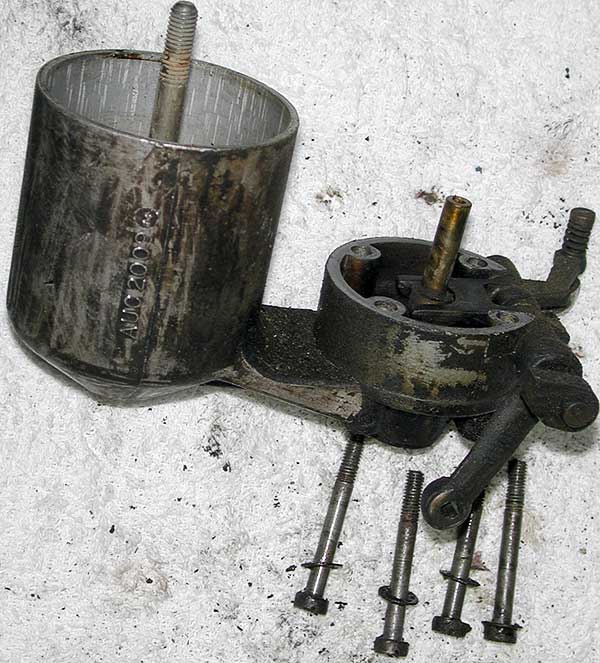
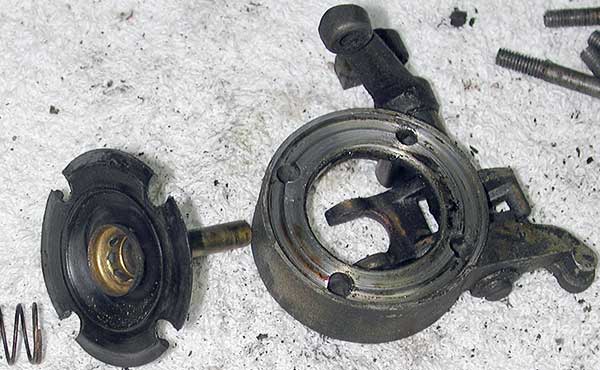
Here’s an exploded view of the challenge.

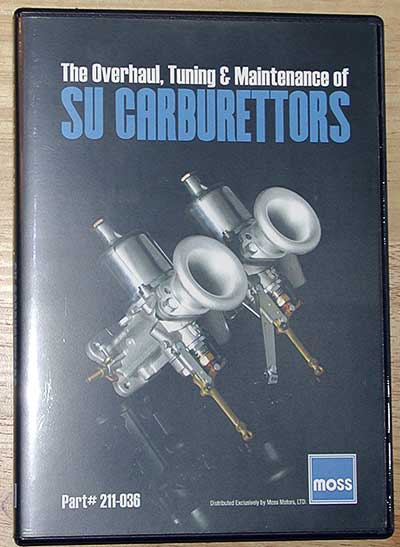
No, not quite as organized as the repair manual photos. This book (see below) was helpful in showing a good rebuild order and some tips on techniques and settings. It does not have exhaustive step-by-step but the important points seem to be covered. I don’t believe this book alone would be enough for me to rebuild the engine by myself. And the Moss DVD I mentioned below was also useful.

Speaking of books, I happened to purchase Jaguar World’s “Jaguar E Type Restoration” book from an English seller recently. That book is a collection of the magazine’s photo coverage of two E-Type restorations, a Series 1 4.2 and a Series III (V-12). While not exactly my car, the other Series 1 is close enough to be of interest. If you go to Amazon or other American book sources you’ll see absurd prices on this book, somewhere around $200 !! I think it is the Jag club in the UK that promotes reprints. Anyway I got it for 23 GBP, with shipping, from VW-DIY.com . Now that I have it I wouldn’t call it a must-have item but the more texts I can find the better.

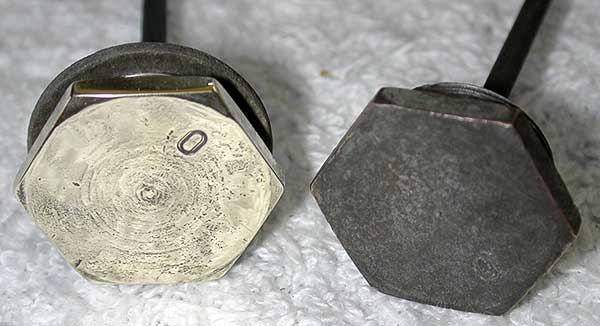
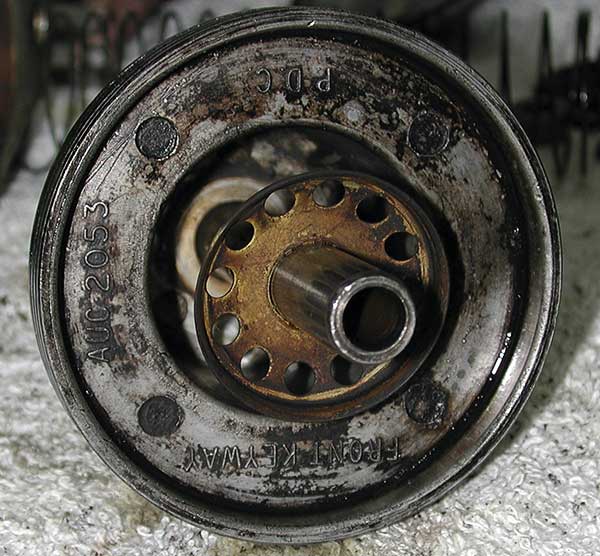
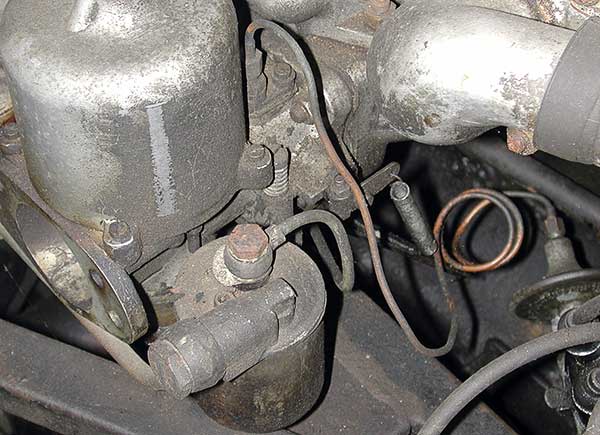
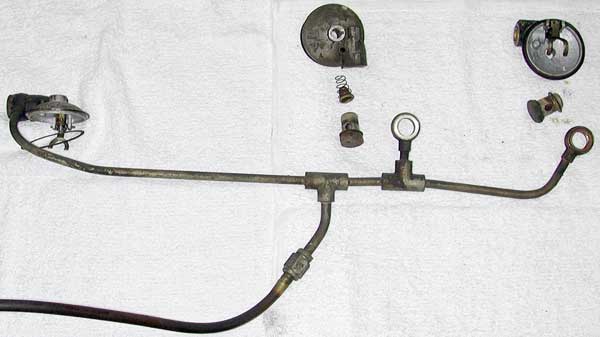
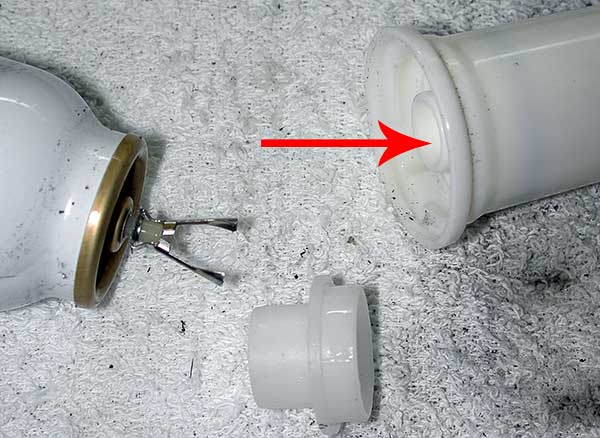
Here is the “Grose jet” replacement for the original carb float valve I mentioned before.

You can see the big lower ball that pushes up against another ball you can’t see. Its random rotation means it should continue working long after the needle on the right starts leaking. You wouldn’t think the Series 1 fuel pump pressure of 3.5 PSI or so would be a big deal but fuel leaks on a hot engine are bad news. Sort of like water leaks for a boat.

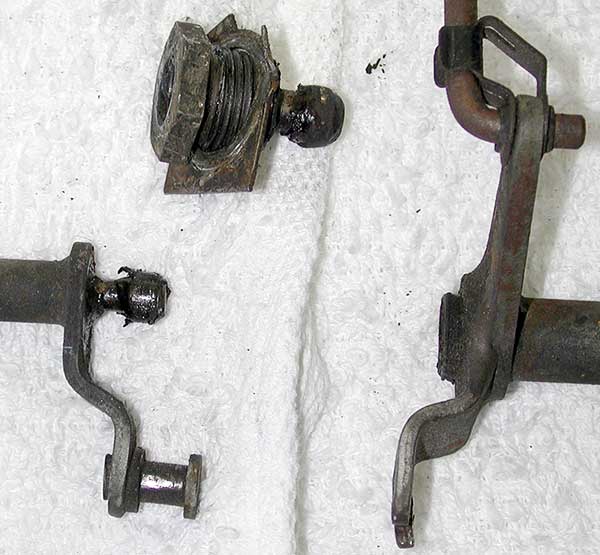
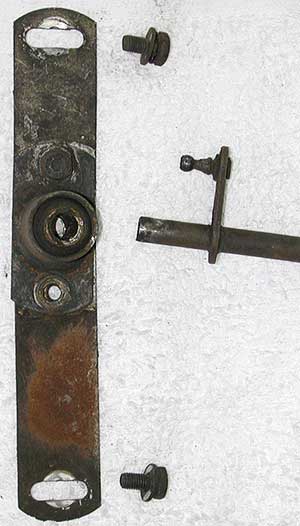
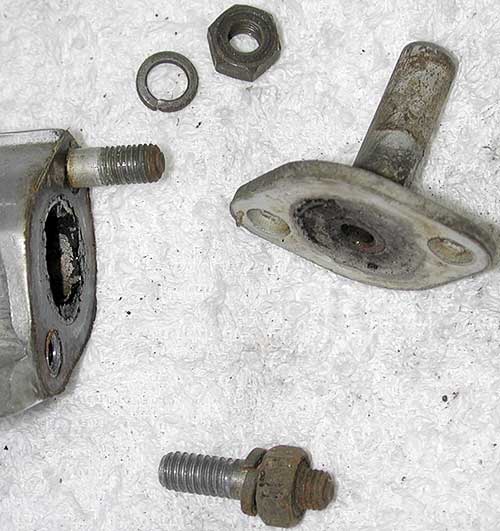
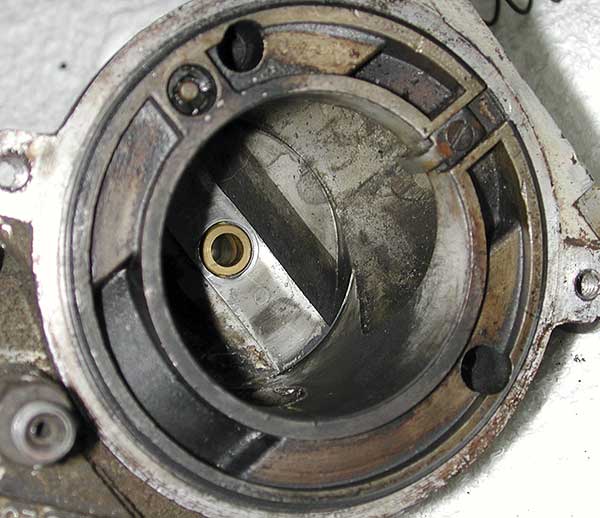
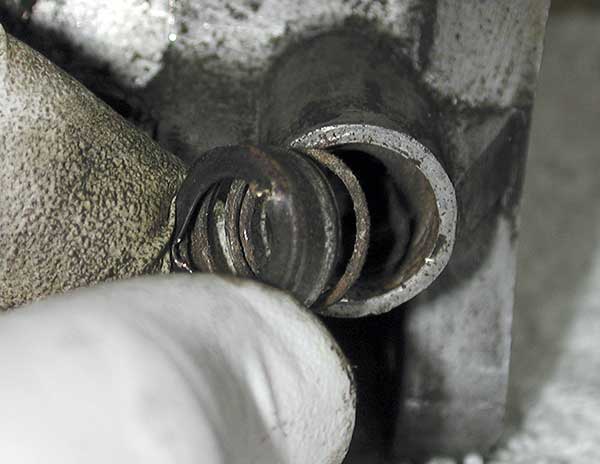
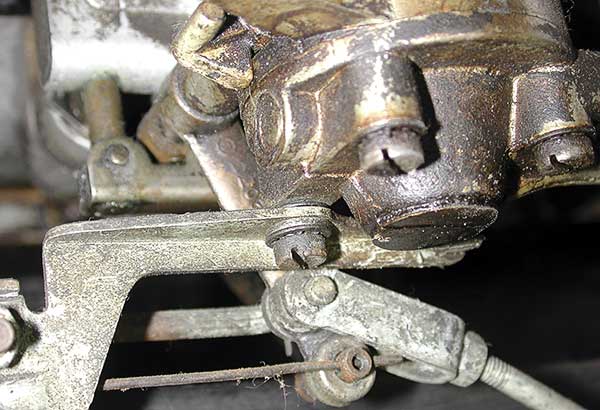
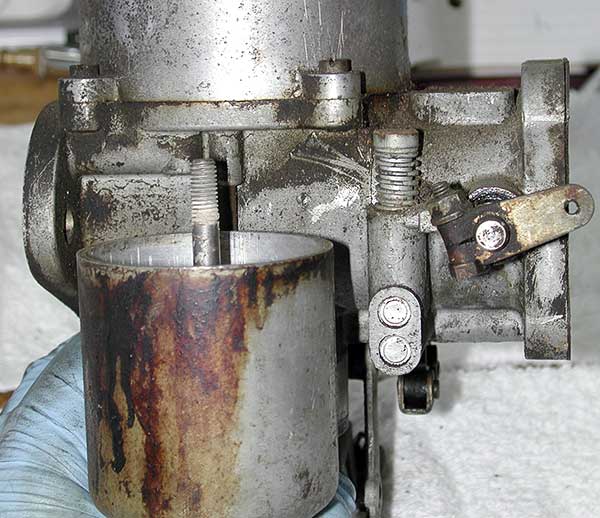
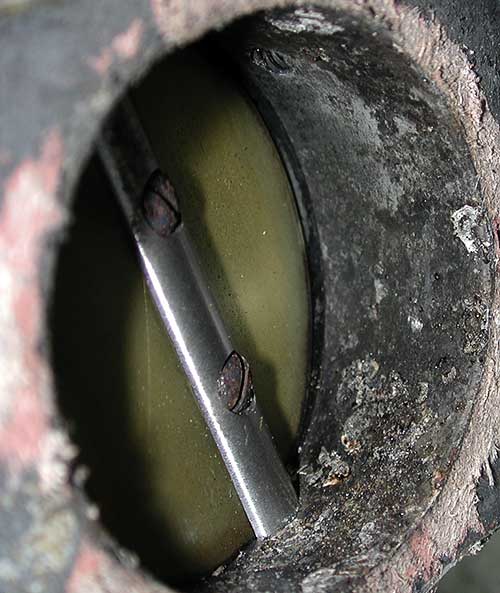
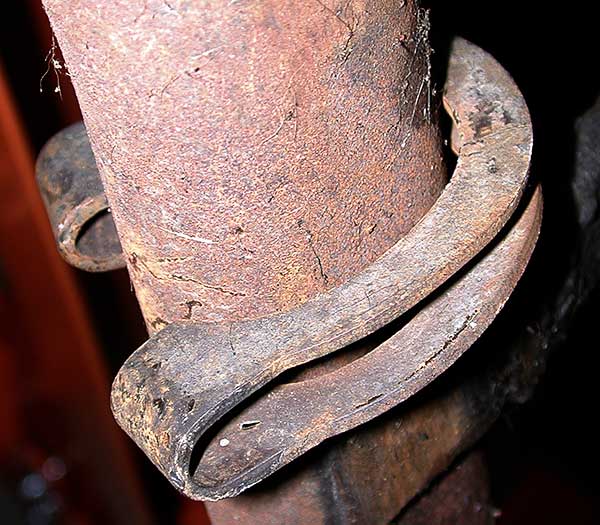
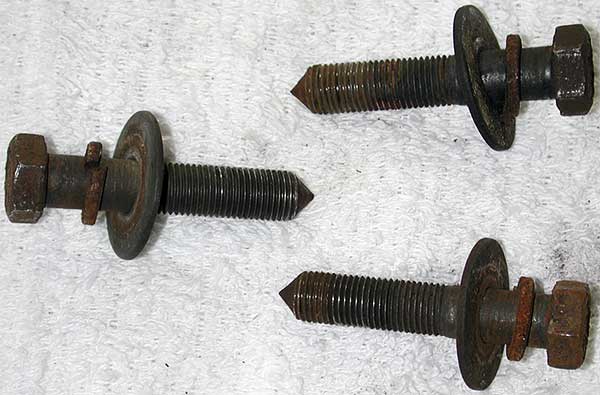
Here is one of the end caps for the throttle shaft. These retain a spring against the cork seal and its dished washer. They are difficult to remove from crusty carbs without some pry damage.

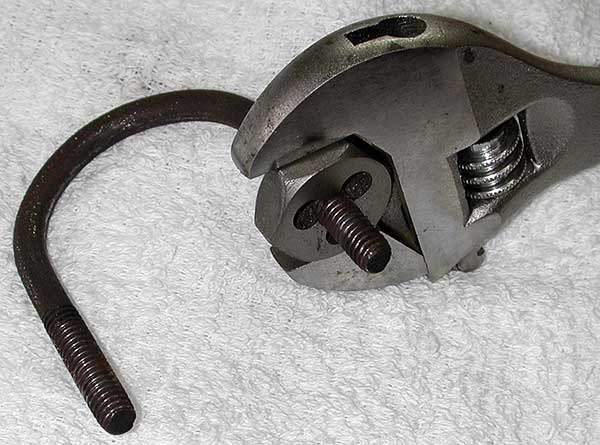
The Moss DVD taught me a neat trick. Slide it over a close-size socket.

Now flip it upside down against a flat hard surface and tap the socket with a hammer.

Not perfect but very serviceable.

The new cork seals in rebuild kits should be soaked in oil for a while before installation.

This reduces the chance of damaging them when you insert them and when you push the throttle shaft through.

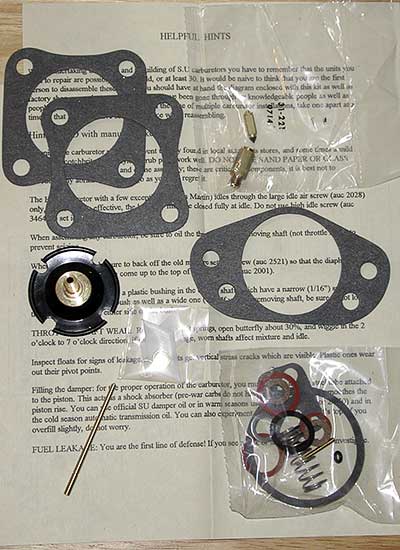
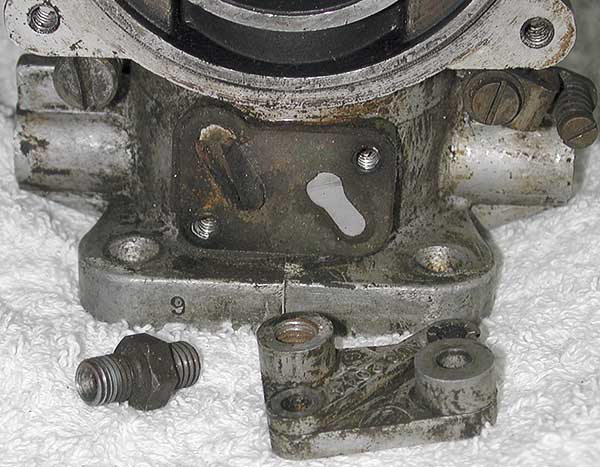
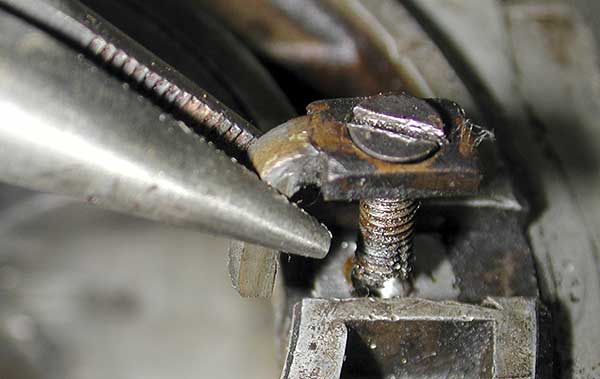
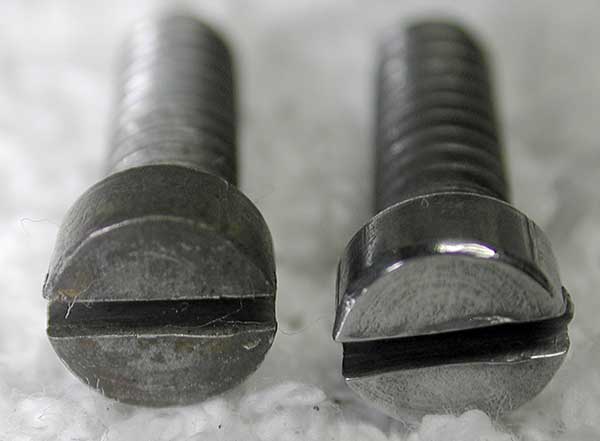
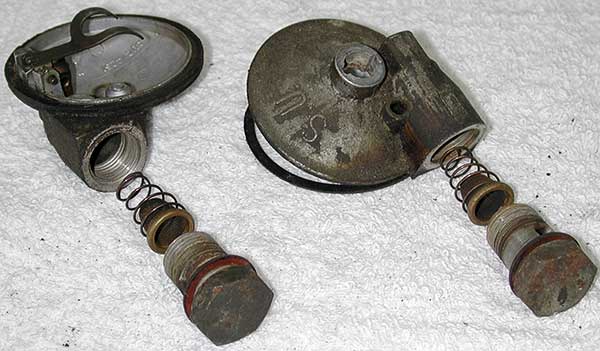
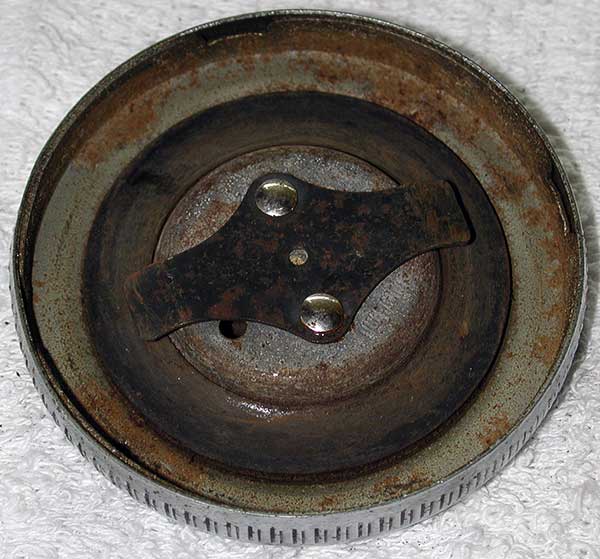
Here is the replacement kit for the “slow run screw” I showed you before that was a bit chopped up. Can you believe the screw was not separately available? There are a couple of parts, like those small springs and screws that must belong on other SU carb versions.

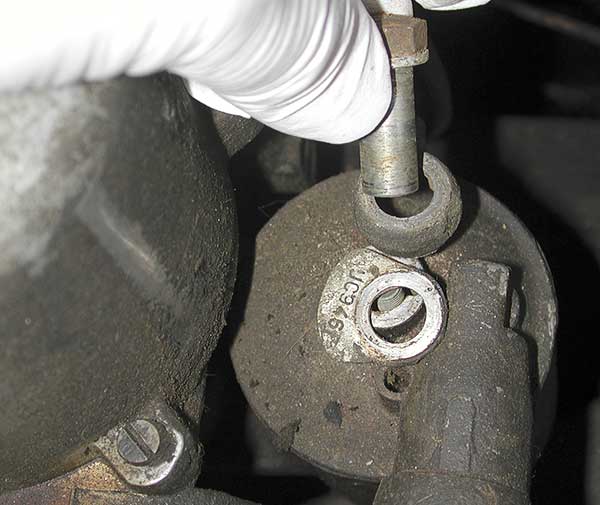
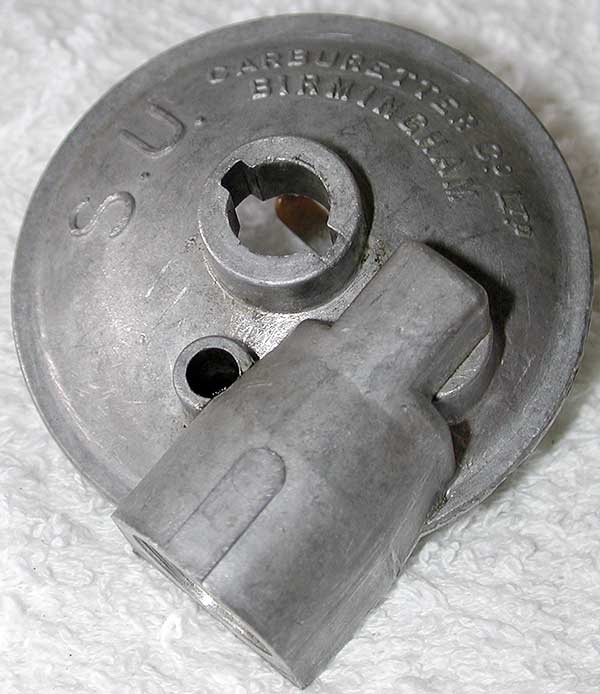
Here is one way to measure the float height. The forked arm is supposed to fully engage the shut-off pin (now Grose jets) 11.1 mm above the ridge of the float lid.

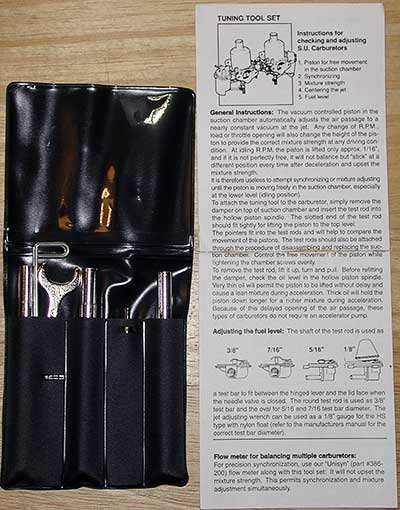
You bend the arm at the end of the straight section to adjust. This is the hard way of doing it. As shown in a prior post, I purchased a small SU carb tool kit. One of the items was an oval tube with just the right width.

Still sort of an awkward task. The usual reason carb float shut-off height is important is because it affects how lean or rich the carb runs by changing the fuel height that the main jet draws fuel from. If fuel is sitting too high it’ll run rich and vice versa. I assume that is also true of the SU’s?

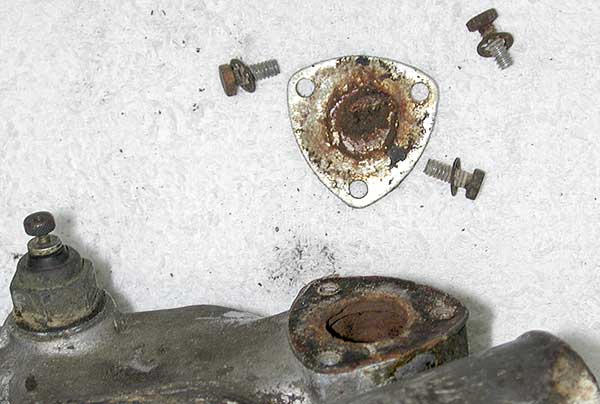
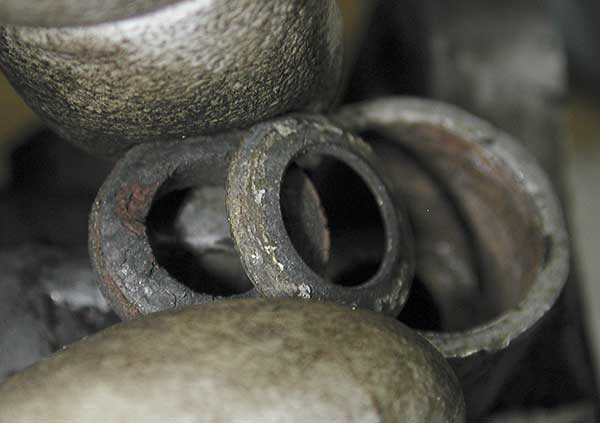
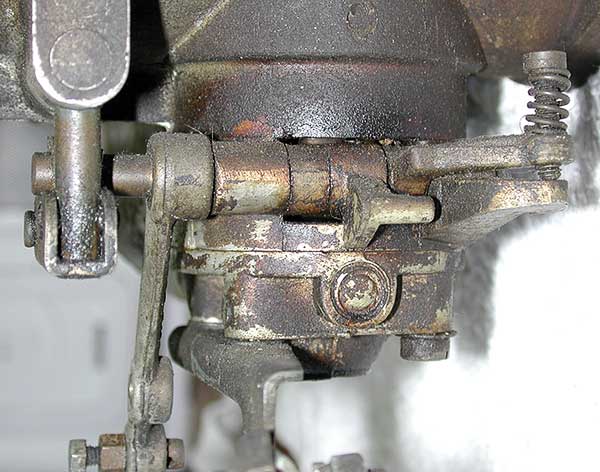
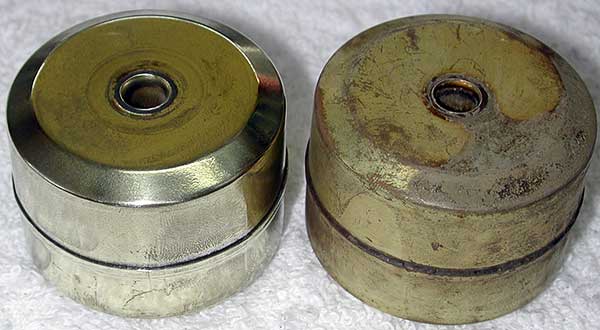
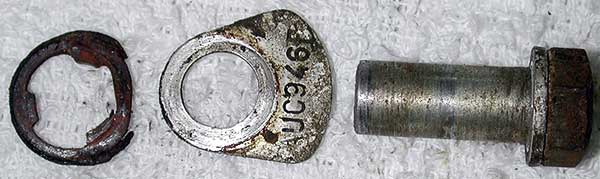
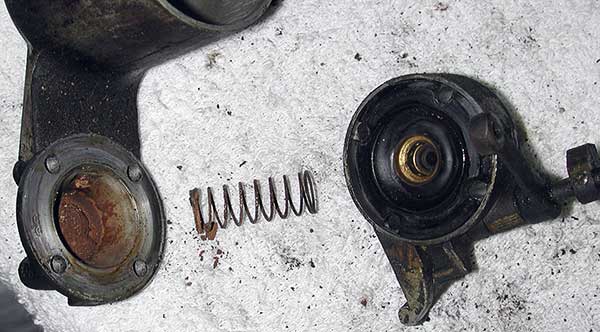
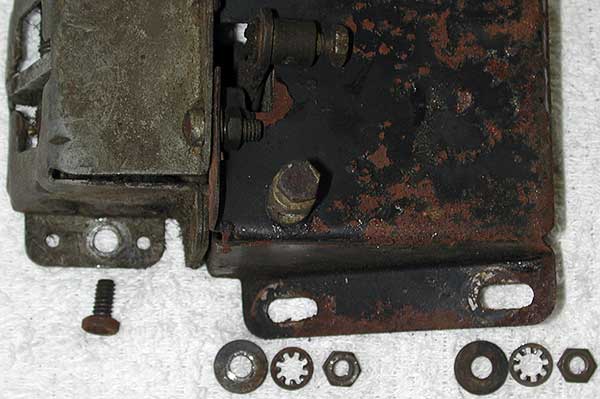
Here is the stack of parts that screws the overflow tube onto the float bowl. I believe the identification tag is supposed to be above the banjo fitting, not below as shown here.

Strange thing. Not ONE of my manuals, including the official Jaguar parts manual, shows the carb ID tags. What’s up with that? It also means I’m not sure if the tag is just inserted under the top washer or if I need to sandwich it with an extra plain washer. One of mine came apart that way but the other two did not. Probably not a critical item. All that seal has to resist is a 1/4″ or so of fuel height before it flows down the open overflow tube.

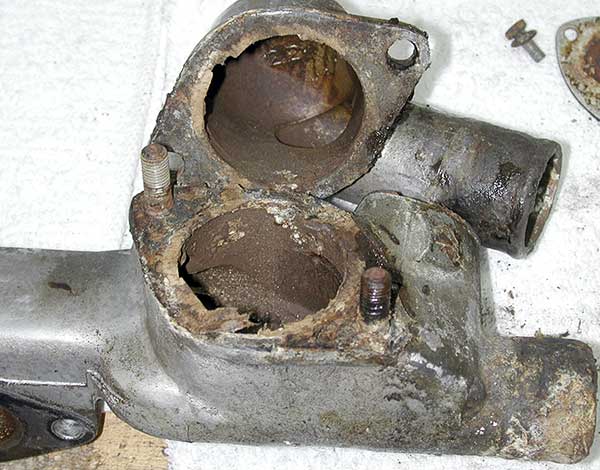
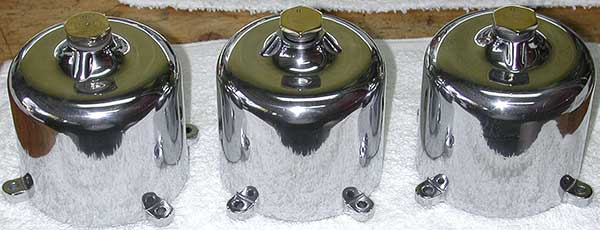
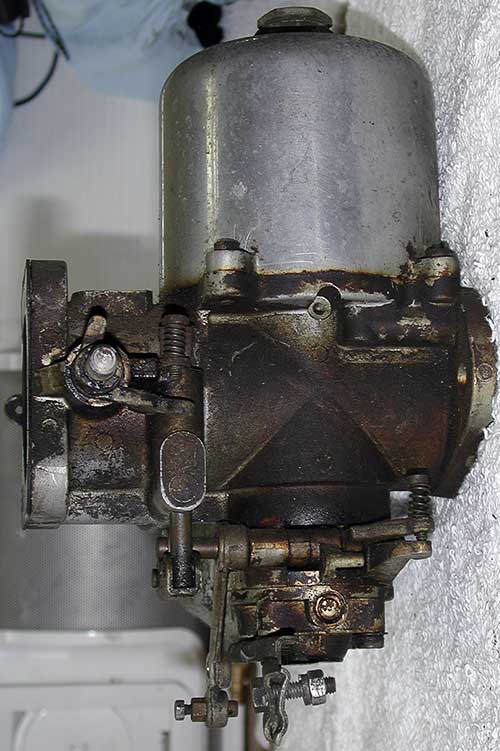
Here is the first little jewel, the front carb, finished on the bench. Yeah, I know, the ID tag is still wrong. Don’t bother e-mailing me on that. I fixed it after the photo op.

Now I got into a rhythm by the third, rear, carb and (can you see this coming?) I assembled its float bowl backwards. I knew it was reversed but my brain was on cruise control. Not too much work to fix it but I was tired and dopey at that point. Okay wise guy, dopier than usual.

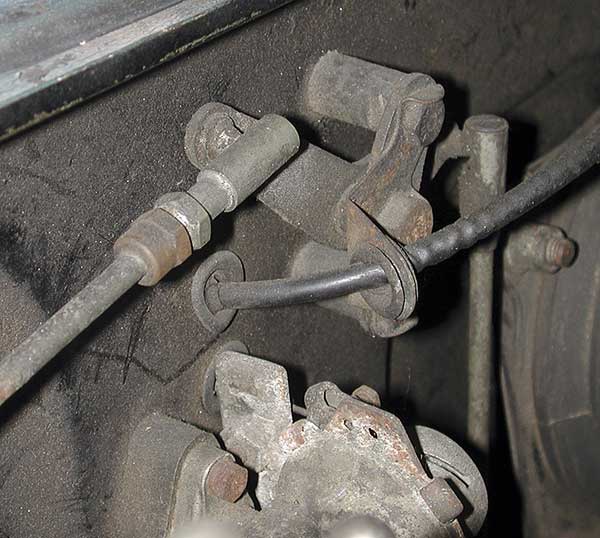
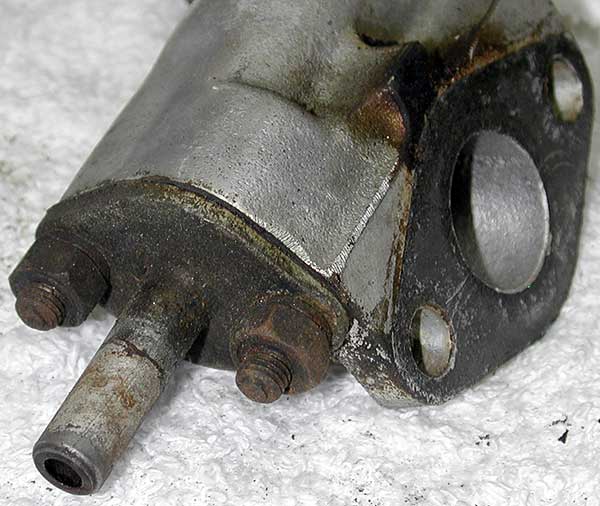
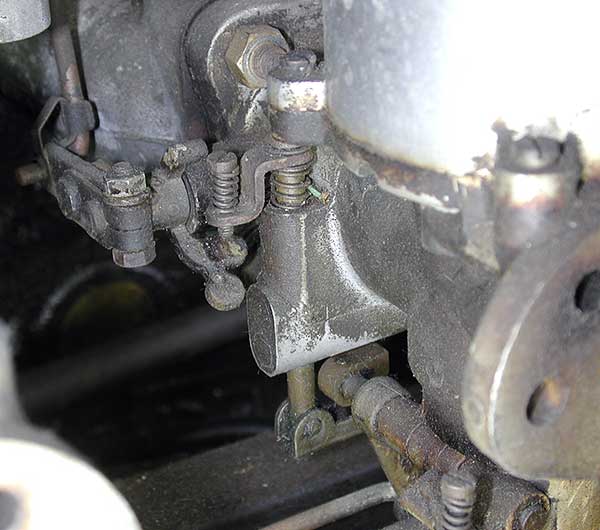
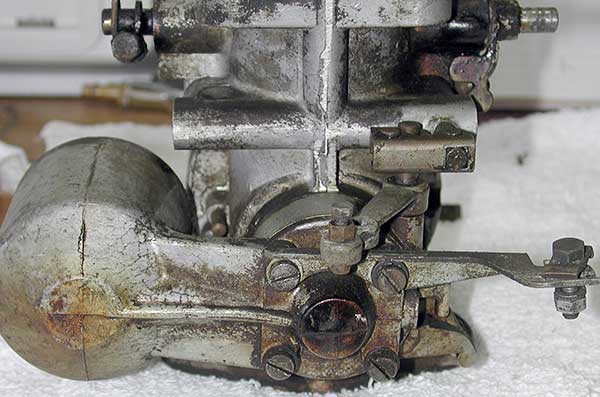
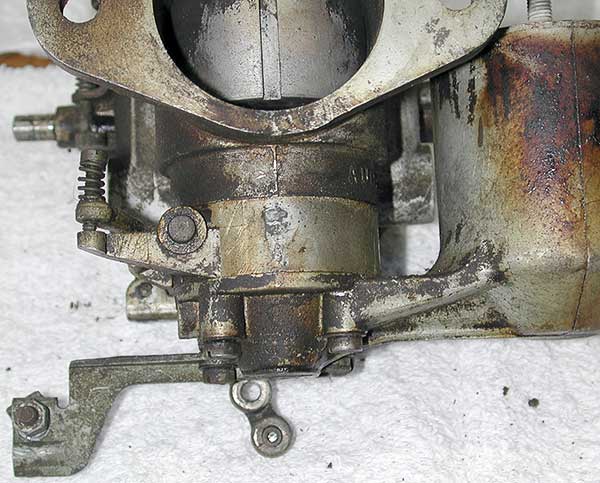
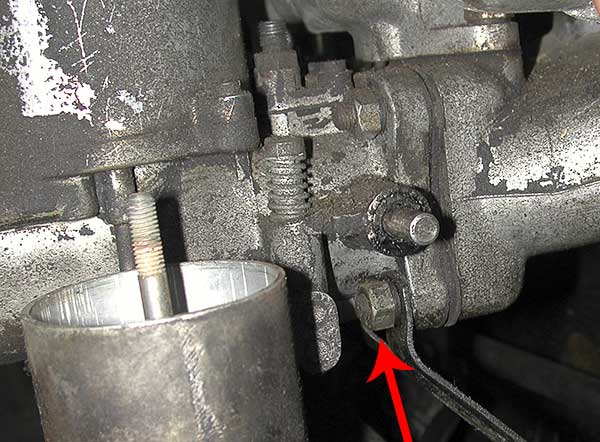
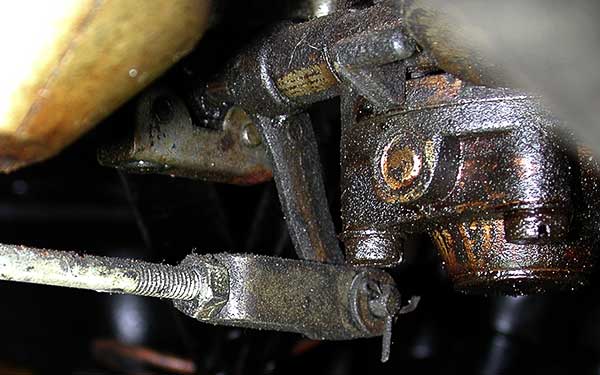
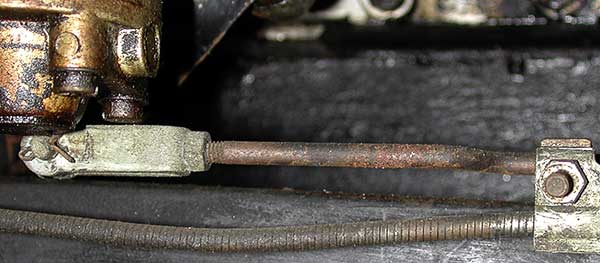
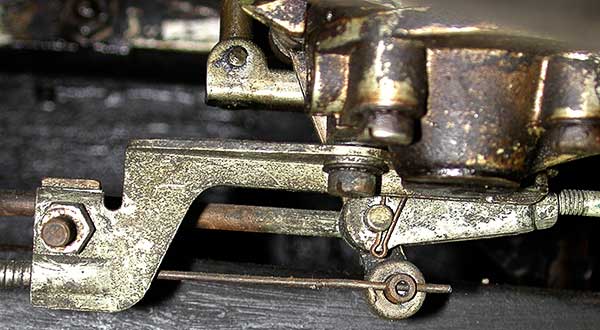
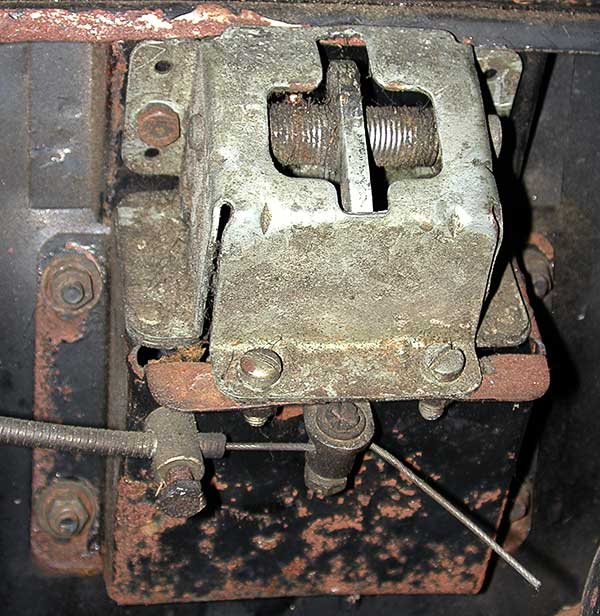
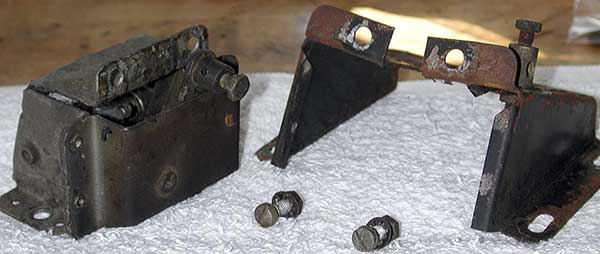
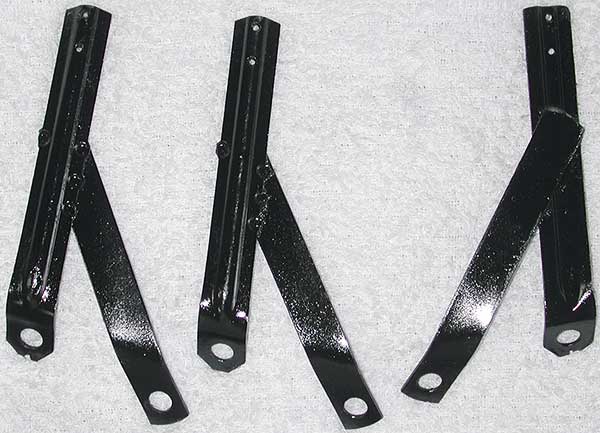
The throttle shaft return spring is connected between the shaft and an arm that is bolted under the carb. The paint on those arms was peel and rusty. A soak in Evapo-Rust worked on the rust. Some Krylon primer and gloss black brings us to this.

One of my new favorite phrases comes to mind, not perfect but serviceable. Maybe that’ll be on my future family crest?

I pushed on into the night because I was close enough to taste carb victory. The rear carb’s main jet was also the most stubborn to center. I must have moved the jet holder five times until I found a satisfactory fit. It still has a little more stiction than the other two carbs but I think that is slight piston corrosion. The piston still drops freely to the bottom. We’ll see if that’s a problem later.

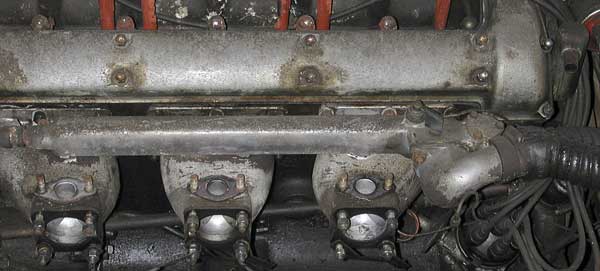
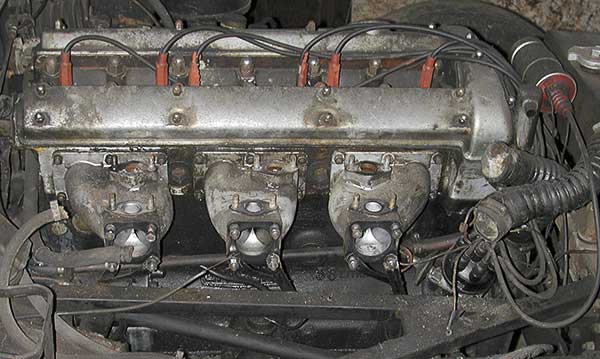
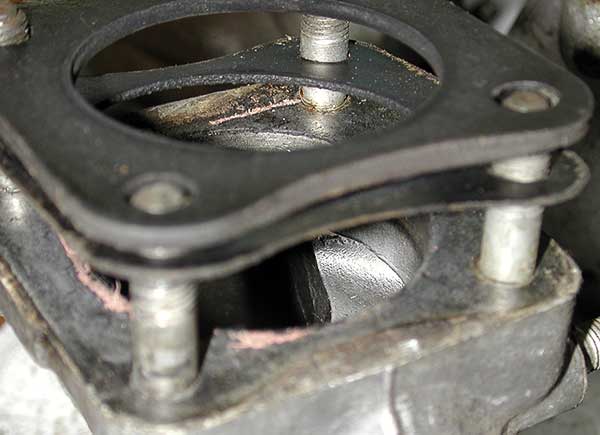
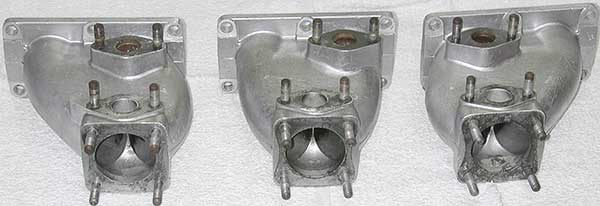
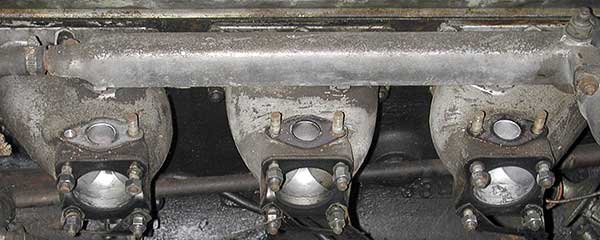
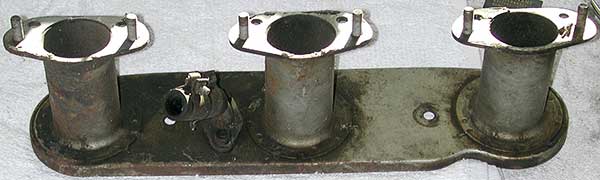
And here are the three carbs, mounted to their intakes and with outer gaskets taped on. I figure that’s as good a place as any to keep the gaskets, no?

I dub thee, The Three Amigos!

April 26, 2008

One of the good guys

Filed under: Uncategorized — Penforhire @ 2:18 pm

Back when I was restoring the BMW motorcycle I came across some of the best people running businesses that service that market. Ed Korn, for example, sent me some of his custom tools before he even received my payment! I thought perhaps that sort of highest-level business ethic was unique to the classic BMW bike community but I am pleased to report that is not the case.

I failed to locate any local vendor to re-bush my SU carb throttle shafts. Oh at least I made contact with several but they admitted to not having the right tools to work on SU carbs. ‘Merican carbs? No prob! I struck out as badly as Nolan Ryan pitching me a fastball. Fine. Hat in hand, I called Joe Curto in New York. With the three hour difference it never seemed convenient to get ahold of him. Then just last week I made contact and had a nice chat with Joe C himself.

After describing the 4 mil maximum slop I measured, Joe was very clear on saying I didn’t need to do anything other than replace my cork seals. He turned down the work! How outstanding is that? That is a man that apparently deserves the good press he gets from the SU carb owner community. Heck, I’m singing his praises and he didn’t do a thing for me. He said that when he re-bushes these carbs that his typical as-new slop is around 2.5 mils and that my 4 mils wouldn’t cause me any grief in tuning. He was not surprised my steel shafts show virtually no wear.

So now I just need to buy some small carb parts before I slap ’em back together. I’ll be replacing the piston return springs, throttle return springs, throttle plate screws, and one mixture screw (showed you the choppy tip on that before).

One of our readers, Ron, e-mailed me a tip on using molasses, cut 2:1 with water, to remove rust if you have months to let it work. I’d never heard of that before but some quick research revealed it is a well-known technique, usually more dilute (I found as low as 9:1 recommended). Maybe that’s why Ron said it took paint off too (most references said it was paint-safe)! Anyway he only paid $8.75 for 2.5 gallons of agricultural molasses. He diluted that into a tub with his rusty heater box and an aquarium heater to keep everything warm. He waited a few months and now has a clean box! My references suggest sugar beet or black molasses works best. There is at least one commercial formula based on it. See Rustbeeter.com. Price was $46 for 5 gallons when I checked so I wouldn’t call that a huge bargain. Huh. I learn something new every day. Thanks Ron!

One more contributor note. Patrick McLoad started a blog to track his Venus restoration. See http://mcload.wordpress.com . His updates might be less regular than mine but he’s aiming to finish his car sooner than me. Seeing his E-Type work I’d say the smart money’s on him to succeed.

Back to my garage. Here is the contrast between the semi-finished right side valve cover and the as-removed left side.

Here is the oil fill cap after starting to sand it.

I notice the lettering appears to painted black. Naturally my paint is crumbling so I worked to clean the letter out more after this photo. I’ll have to paint it later.

I spotted something odd on the left cover as I was cleaning it with Simple Green.

Hmm. That looks like some over-tightening cracks filled with epoxy. And on the interior side —

Yep, someone welded it up. Now what I don’t really understand is the valve covers are just sort of a splash retainer for the oiling of the top end. They only have to hold a seal against splashing, not any real pressure. So what monkey would overtighten one nut so much as to crack the aluminum?! Sigh. I scraped off the epoxy to take a better look. I am thinking that I can make a more invisible top-side repair by sandwiching some JB Weld under aluminum foil fitted around the cracked area. The foil might match the polished aluminum.

Anyone have a better idea or materials to suggest than that? I can’t see scrapping the whole cover for what amounts to a small cosmetic defect.

I started hand sanding the whole cover just like the other side but it occurred to me that there HAS to be a better way to do the job. BMW Joe had recommended those Scotchbrite-like surfacing pads. These are usually abrasive-coated nylon. I didn’t think they had the coarseness to cut aluminum like 100 grit sandpaper but it was worth a try. Off to Lowes. 3″ coarse pad onto my pneumatic drill.

Surprise surprise. It cut aluminum just fine. But at 1.8K max RPM it was prone to wobbling and dancing on the surface uncontrollably.

Hmm. I stepped down a 2″ pad mounted to a pneumatic die grinder (25K RPM). Nirvana! That gave much better control, not to mention a faster cut. Maybe too fast. Did I mention there seems to be a learning curve to every tool I use?

I went from coarse pad —

To a medium pad —

To a medium-fine pad —

I finished with a fine pad. These pads are neat. Even after all this surface area they are each still working fine. I went through several sheets of sandpaper doing the same work. But at this point I could clearly see that my coarse work was, well, coarse. I did not keep the surface grinding even enough. So I went back to sand paper and, as I write this, I need to work the entire surface again. See the mottled area near the red arrow in this photo.

That is the start of my hand sanding in that area. I have to work it until the surface is even. Oh I tried jumping to the emery polish wheel but the surface waviness is obvious. So back to elbow grease. I’m sure my next polishing effort will go smoother (get it?) but the left cover is taking longer than the right cover. I have no doubt it’ll look better than the right when I’m done. Actually that scares me. If it looks too much better I’ll have to slave over the right side again. Sigh.

I like to finish what I start before moving on so I’ll be completing the valve covers before I return to the carbs. Maybe in the next post. We’ll see.

Just a heads-up. My internet connection is DSL now and I’m lucky if I get 700K BPS down and 150K BPS up. I’m getting Verizon FIOS installed in early May. I’ve heard some installation horror stories but Bob at work says it went smoothly for him. Anyway if my home connection goes down for a while my posts will be more irregular than usual. But I sure am looking forward to 5/2 MBPS (Bob says he gets that rated speed). I’m picking up their Triple Play service and dumping DirecTV. My monthly cost will be about the same as I’m paying now for phone, ISP, and TV combined but all those services are upgraded in different ways.

I’m looking forward to a car show at the Muckenthaler Museum (themuck.org) in Fullerton May 17th & 18th. The Los Angeles Jaguar club is advising their members to compete in the concours on Sunday. Maybe I’ll get to crawl around a working Series 1 E-Type! I haven’t joined the Jag club yet. Their $70 annual membership fee keeps riff-raff like me out I guess. I can’t quite see what is worth THAT much coin to be a member. I mean, that’s about twice the typical dues for every other vehicle club I ever joined, and I’ve joined a bunch, excepting maybe the AMA or SCCA which are larger organizations that clearly do more. Any Jag club members want to make a case for their value here?

April 13, 2008

Aching beauty, aching hands

Filed under: 1962, auto restoration, car restoration, E-Type, Jaguar, restoration, XK-E, XKE — Penforhire @ 2:33 pm

Did you see the blog comments from Patrick McLoad? He owns a stunning award-winning E-Type. I’ll put a link to his site (http://www.mcload.com) in my blogroll at the upper right. Check out the story in his The Cars/The Jaguar E-Type links. The images of his car are what I call “achingly beautiful. I see them and they make my breath catch.

His body shop horror stories fill me with dread and anger. Yikes! I need significant body work. If there is one auto service that gets more bad mouthed than any other it is body work. Maybe it is because the paint and body are the most obvious impressions a car makes on you. Or maybe the industry just overflows with spastic monkeys who think they know how bend metal and paint.

Anyway, my vision for this car is to be a driver not a show car. I don’t want it to be clearly bastardized, like a small block Chevy V8 under the hood. I mean, if you want a kit car why destroy an authentic original classic car to do it? At the same time I want it to be as reliable, comfortable, and safe as is reasonable. Oh, and slightly improved engine power wouldn’t hurt either. I have no ethical problem upgrading the radiator & fan, changing to tubeless rims, converting positive Ground to negative, better-insulating the cockpit, and maybe some brake upgrades. But, for example, I am hesitating over the thought of a T-5 tranny conversion. Restoring my later-year 4-speed synchro box is a bit more authentic while the 5-speed T-5 is probably an all-around improvement. My father-in-law says the original non-synchromesh Moss tranny is in his garage somewhere but that is just TOO authentic!

Back to the garage.

Here’s an image of some rusty studs from an air intake manifold. I pulled all the studs off to sand all the intake sealing surfaces clean and flat. I put the sandpaper on a piece of glass and drag the part across it to maintain flatness.

I’m using a cheap stud remover and it tends to slightly damage the studs where it tightens. Should not be a problem since the entire blank area and some of the threads are dead space at the center of whatever the stud holds down. Regardless, I probably should have run a die over the studs AFTER I replaced them not before (like I did), eh?

I found something new (to me) to remove rust. I saw an ad in Eastwood’s catalog for a non-toxic rust remover that is not an acid and isn’t even toxic. I was familiar with phosphoric acid (naval jelly) and hydrochloric acid (a.k.a. muriatic acid). Those work but are hazardous to handle, disposal is restricted, and they eat the base steel or iron after removing rust. Sand blasting works but it alters the surface and is messy for me to use (I have a tiny cabinet). I was thinking Eastwood’s product couldn’t possibly work well but I figured I give it a shot. Just as I was about to order some I found a number of references to an identical-sounding chemical sold as Evapo-Rust. Seems to be about half Eastwood’s price. And local Auto Zone stores carry small containers of it. Off to Auto Zone.

This stuff actually works! You have to keep the part submerged or wet. You can flow it over a large part with a recirculating pump. Most parts had to sit at least overnight. They claim the active ingredient chelates rust but will not touch uncorroded metals. You can touch it with bare skin and, in theory, you could swallow some and not die (I’m not testing that). Oh yeah, it is still expensive. I main-ordered one gallon from an Amazon.com seller and it cost about $45 delivered.

Now since then I discovered an ever cheaper version, D-Rust-It. If I need more than I have I’ll be trying their concentrate. Somewhere around $50 of concentrate makes up 10 gallons of working solution. If you know of a cheaper source than D-Rust-It post a comment!

I tried it on the sludge in the coolant path of the air intakes but that stuff must not be mostly rust. I ended up scrubbing those pathways by hand. There is a dead-end section in each intake and I can’t understand why it was designed that way. Coolant has to be stagnant in that corner?

I decided I wanted to polish both valve covers because, well, you already know I’m insane. Job duration is entirely dependent on surface area to clean and polish. And the valve covers are huge!

Here is the starting point of the passenger-side valve cover.

Here is the engine without the cover. This is the first overhead cam engine I have poked around in. It is shocking to see the camshaft lying naked on top like this.

Here is the rear section of camshaft.

Here is the front. Note the chain drive.

There is some very slight pitting on the lobe surfaces. Hard to capture on film but here you go.

So how much is too much pitting? I’m thinking I shouldn’t see ANY damage. This is also in, to me, an odd location, along the flat of the lobe. Not enough lubrication? Well, not yet time to plan the engine rebuild. We’ll see what’s what down the road.

I cleaned the crud off the valve cover with Simple Green (and a lot of elbow grease).

Next I went through a couple of sandpaper steps. Here is what it looked like after 220 grit.

Believe it or not, I should have gone down to an even coarser grit. I had to work long and hard with 220 and some areas could use a deeper cut.

This was followed by 400 grit. Just about right for cutting through the 220 grooves.

I maybe could have gone to 600 grit but I jumped to emery compound on a polishing wheel. Here it is after the first pass. About a day’s work!

Nowhere near done yet. You know I have patience but this much surface area is ridiculous. I started to whine to myself after the first pass.

I used a “polishing bob” on a die grinder for areas too small for a 6″ polishing wheel to reach.

I’m sorry if this seems like a short amount of work for the time past. It isn’t. If you don’t believe me you can come over and help me start on the OTHER valve cover!

All work and no play? That’s not me. BMW Joe and I went on a charity ride for bags4kids.org. And there was a miracle! Gary came out riding too. So we knew the temperatures (his bike has our only thermometer). Much warmer than our last club ride but we just kept asking Gary for the temperature anyway. Here are our iron horses at the start, Santa Clarita Motorsports.

That’s Joe standing in front of his BMW K1200RS (last generation). Gary’s Honda ST1300 is just behind and my Yamaha FJR1300 is in the rear. I go out in what I call “dreadnaught mode.” With that Givi top case I’ve got a lot of storage and I try to be prepared for trouble. The guys used to kid me about having the most electronics mounted on my bike but Joe took over as lead geek after he mounted a new Garmin made-for-bikes GPS, while my GPS now rests in a saddlebag just for emergencies.

We had a great ride through the high desert where California poppies were in full bloom. Had to dodge tourists. I should have stopped for a photo of the amazing sea of orange flowers but we had places to be. We got lost (bad directions). Before Joe could find a correct route using his GPS Gary got directions the old fashioned way, he asked at a gas station. Score one for old tech.

We actually made several wrong turns. Worst directions we’ve seen in years. But we had a good time anyway. Our poker hands (it was also a poker run) were not worth mentioning, neither high nor low.

Here’s Joe holding up a $10 bill at the end of the ride.

He won a Harley hat in their raffle. Look again at our bikes, three variations on state of the art sport-touring. Think we promote Harley Davidson much? Joe found someone right there willing to trade $10 for the hat. Gary won a windbreaker.

I happened to win a $20 gift certificate… from Harley Davidson. I guess you take your ride sponsors where you can find ’em. I give it to my wife. I’m sure she’ll re-gift it to someone soon.

Next time I should have the first valve cover done. Oh my aching hands!

March 31, 2008

Pirates repair carbs?

Filed under: 1962, auto restoration, car restoration, E-Type, Jaguar, XK-E, XKE — Penforhire @ 6:54 pm

Since last we talked I’ve been trying to line up throttle shaft re-bushing service for my SU carbs. I explained the process in my last post and while it is not brain surgery many owners persuaded me not to try myself.

I happen to live in a densely populated area near Los Angeles so it is no surprise that there are a half-dozen or so shops within driving distance that claim to specialize in carburetors. What is a surprise is the shadowy existence of these shops. Maybe there is something inherently flakey about carb repair specialists? Let me re-enact the call I had with one such shop, Doctor Smith Carburetors.

Me: dial xxx-xxx-xxxx, brrrring, brrrring

Doc: Grunt, sort of like “Guh!” or maybe “Ugh!”

Me: “Hello?”

Doc: “Arrrrrr, I’m a pirate!” Well it wasn’t really those words but that’s sort of what I hear.

Me: Pause. What did he say? “Hello, is this Dr Smith Carbs?”

Doc: “Yeah” Hmm, maybe he had a chicken stuck in his throat?

Me: “Oh. Good. I’m looking for a shop that can re-bush the throttle shaft on some SU carbs. Is that something you guys do?”

Doc: “Arrrrrr, I’m a pirate!” Hmm, now I could swear that is exactly what he said… again.

Me: Pause. Try to digest his words. Any other possible meaning? “Um… I’m looking for carburetor repair service?”

Doc: “Nyuk, nyuk, nyuk!” or something really close to that, with a Three Stooges lilt. And he hangs up. The line goes dead.

I’m staring at my phone like maybe it isn’t working right. Only my phone is fine. And I’m not deaf or even hard of hearing. Who knew that pirates do indeed repair carbs? I’d have suspected a five year old got loose in his office and answered the phone but the voice was clearly a middle-aged man.

That exchange was so surreal, and sort of funny, that I had to share it with you. Yes, that is just how I remember the call. No kidding.

The two other closest shops, P&J Carb and Carb Care USA don’t seem to answer their phones the several times I’ve called. I have this vision of a single mechanic lying on a creeper under a car when the phone rings. But we’re talking about carbs here right? So, what, maybe loud engine-stand or flow bench testing? Dunno, but I left a message and we’ll see if they return the call.

Back to other things. You must have commitment when you decide to polish something. If you start but don’t finish it’ll be obvious and look like crap. Here’s the start of polishing up that air balancing manifold.

2650-air-manifold-start-polishing.jpg

And here, presto change-o, like magic, is the polished air balancing manifold.

2651-air-manifold-polished.jpg

Do I really need to mention how many hours went into this? This photo represents more work than most of the rest of this post’s work. But would you really want to see a hundred photos of me polishing the same damn piece of aluminum? Didn’t think so.

I didn’t take pictures of it but I also worked on the throttle linkage bits (see bits in last post). The smaller pieces de-rusted okay in a vibratory bowl after about two hours in wet green pyramid media. Then I worked them with emery grit on a polishing wheel. I went all the way down to 200 grit sandpaper on the larger linkage pieces but even then I am not entirely happy with how they turned out. Some of the corrosion spots are just too deep, structurally sound but a cosmetic weakness.

Speaking of awful corrosion, here is the water manifold, rubber hoses going to the radiator.

2652-water-outlet-manifold.jpg

Here is a closeup of the forward end.

2653-water-out-forward-end.jpg

That yellowish wire off some sensor (temperature? pressure?) turns green as it passes below the rubber hoses. The hose nearest the engine goes down.

2654-hose-near-engine-goes-down.jpg

The other hose goes to a box on top of the radiator. Here is the back end of the water manifold.

2655-water-out-rear-end.jpg

That hose off the end snakes behind the engine and ends at a what’s-a-whose-its (TBD) just under the firewall throttle linkage.

2656-water-out-behind-engine-under-throttle-linkage.jpg

Here is the water manifold on my bench.

2657-water-out-manifold-on-bench.jpg

This was not the easiest part to separate from the air manifolds under it. It had corrosion-welded itself to a couple of the mounting studs. I banged around with penetrating oil for a while but I still had to pry it off. As I took it apart I began to despair of the possibility of reusing it. It has an awful lot of corrosion. And I started to get nervous about the other water passageways.

Here is one of the three water outlets that goes to (and through) the air intakes.

2659-one-of-3-outs-to-intakes.jpg

Here is the forward end, where the rubber hoses connect.

2660-forward-end-corroded.jpg

Hmm, I imagine this is where the thermostat goes? Nothing but an empty chamber right now.

2661-wheres-the-t-stat.jpg

Here is the radiator return loop split open.

2663-radiator-return-loop.jpg

At this point I threw the manifold in a box rather than spend time polishing it up. I think I’ll be buying a new one though the shaping makes it look expensive. Oh well, win some lose some.

Here is the engine without that water manifold.

2664-engine-without-water-output-manifold.jpg

I pressed on. Here are the three air intake manifolds on my bench.

2665-air-intake-manifolds.jpg

They are completely different shapes and you’d have to be an idiot to remount them incorrectly. Hold that thought for a few months or years. These also continue the tradition on this machine of not allowing enough space around nuts to use a proper socket or Gearwrench. You can only fit open-end or thin box-end wrenches on many of the mounting nuts. And of course you can’t swing in a big arc. Tedious and far too common. If I was spoiled by my air ratchet and Gearwrenches, well, this machine will keep me humble.

Here’s a view of one of the water inlets on top of an air manifold. This delivers water to the head right between the siamesed air runners. You can see the rectangular outlet slot to the head on the center manifold in the photo above.

2666-example-air-manifold-water-inlet.jpg

Nice corrosion. Here is the engine head without the intakes on it.

2667-engine-without-air-intakes.jpg

And a close-up.

2668-close-up-of-head-openings.jpg

On the carburetor side of the air intakes there were two stacked gaskets, thick and thin.

2670-stacked-carb-side-gaskets.jpg

Here is another of those water inlets to the air manifold. The arrow points to a gouge where something took a bite.

2671-something-ate-a-chunk.jpg

Doesn’t leave much area for sealing water pressure right there. I can see I’ll be slathering the Hylomar or other gasket seal liberally.

And to end the suspense, cleaned up air intakes.

2672-clean-air-intakes.jpg

Nice! I still need to clean up the water interior passages. Does anyone have suggestions on the best fluids or technique to get rusty gunk out of there?

Here’s a preview of my next intended work. The arrow below points to an oddball valve cover nut on the front passenger side.

2669-oddball-valve-cover-nut-passenger-side-at-front.jpg

All the rest are chromed acorns. Why is that one plain? A mystery for another time.

So matey, keep a weather eye peeled for this here monkey with a wrench. I’m off to find a scurvy dog to work on my carbs. Abandon hope, all ye who enter here (I used to have a variation of that slogan on the front license plate frame of my Integra GSR, “Abandon hope, all ye who enter under here”).

March 22, 2008

Luck of the Irish

Filed under: 1962, auto restoration, car restoration, E-Type, Jaguar, XK-E, XKE — Penforhire @ 10:13 pm

Here is the SU carb DVD I bought from Moss Motors.

2614-su-carb-dvd.jpg

$40 and worth it for a handful of tips I did not know, such as how to center the main jet without a centering tool. It covers all four types of SU carbs from disassembly to rebuilding to tuning. Amateur “production value” (lighting, editing, lack of main menu) but two thumbs up from me.

Here is what appears to be the ‘standard’ SU tuning kit (looks the same from different vendors).

2615-su-tools.jpg

Unfortunately it does not include Whitworth wrenchs for the jet guide nut or the float shut-off valve. A little research shows me Whitworth tools are awfully expensive, even discounted on e-Bay. Must not sell enough of them. I have to keep my eyes open because there’s just no way I’m spending over $100 on a small Whitworth socket selection!

Here is one of the three SU rebuild kits I got.

2616-su-rebuild-kit.jpg

Looks very nice. It is not 100% of what I need. I figure to also replace the two butterfly screws, main piston spring (long soft one), and exterior throttle return springs. Note the newer style butterfly screws are not split but rather have a dimple that you centerpunch to expand. One of the tips in that DVD is about supporting the throttle shaft in the carb when you punch those dimples.

Check this out. These are the carb damper piston tops before and after polishing.

2621-damper-brass-top.jpg

That brass sure sparkles but you wouldn’t believe it looking at the corroded one!

Here’s some advice about polishing. If you are working at a particular grit stage stop if you see an imperfection that bothers you. There is no point in going to a finer grit because that mark will NOT look better after you polish with finer grits. All you’ll do is waste time. You have to back up to the grit that removes the unwanted mark or pit. I know that sounds obvious but even after I know better I still waste time working the same grit longer than I should rather than back up.

Look, triplets!

2630-sisters.jpg

If you have occasion to have your carb bells off like this make sure you do not mix up the bells and the needle pistons. They are each matched pairs and all my repair references have dire warnings about mixing them up because the vacuum-operated tolerances are so close. I seem to be fortunate in that my bell/piston sets seem to fit just right, not worn out. Of course the proof is in the tuning and that is light-years away.

One thing that may be worn excessively on my carbs are the brass bushings that carry the throttle shaft (butterfly shaft). Most references and some of the other E-type owners I contacted say the shaft should be very snug, no perceptible wiggle. I measure about 4 mils total worst wiggle in mine. The steel shafts themselves are unworn. The wiggle does not change if I slide the shaft a half-inch to ride on a virgin section. And my flat-anvil micrometer says the shaft diameters are 0.3105″, also indicating no difference in the wear areas (to maybe 0.2 mil resolution).

The issue is any vacuum leak through the shaft causes idle tuning to be a nightmare. Such a leak will vary and the butterfly itself may not seat exactly the same every time. Given the time and effort I am putting into this restoration why take a chance? I e-mailed Joe Curto to see if he agrees, is there any reason to consider the +10 mil standard over-sizing, and how much he’d charge to rebush. He is one of the top SU repair shops and parts suppliers in America. He must be busy because he hasn’t gotten back to me.

I found some references to the job. The old bushes need to be carefully drilled out. New bushes that start undersize are press-fit. Then they are reamed with a piloted tool to attempt perfect concentricity (one side of carb to the other). This reaming should be slightly undersize, by only 1 mil or so, and the final fit should be lapped in place by the actual throttle shaft. Now if it is done that way I can see why “no perceptible motion” should result.

I am checking out local shops to see if anyone offers this but I do need to re-bush before slapping the carbs back together. As you might imagine, by the time I got to taking apart the third carb I was darn quick. I anticipate the hardest part of reassembly to be the throttle linkages. The carb guts are that simple!

Since I am a stalled on carb assembly I studied the engine to see what else I might like to strip off the top. Right above the carbs is an “air balancing manifold.” This is a tube that links all three carbs after the butterflies, just before the siamesed intakes. It is mounted to those intakes and a vacuum line at the rear of it goes down to what looks like an accumulator (vacuum storage) and then a line goes from there, across the firewall, to the brake servo. Looks like I have vacuum assist on this car. It may or may not have been stock. I see references to a mechanical lever on early cars but the vacuum bellows widget is supposed to be a big improvement.

Here is the balancing manifold (arrow pointing up) and the vacuum accumulator (arrow pointing down, I’m just assuming that is what it is for now).

2632-air-balance-manifold-vacuum-line.jpg

The upper throttle linkage runs along the top of the balancing manifold, into two manifold bosses. Here is a close up of the center joint.

2633-upper-throttle-linkage.jpg

Here is the front end joint.

2636-upper-throttle-linkage-front-end.jpg

Both joints are 3/4″ bolt heads held captive by some sort of fold-over washer-widget. It is easier to unscrew them if you bend the folded piece back to flat. Ah yes, advice learned the hard way.

Here is the rear end of this throttle linkage run. It terminates into a firewall-mounted sleeve. Mine is missing a bolt!

2637-linkage-pivot-on-firewall.jpg

That sleeve has a rubber surround that must be used to take up misalignment or torsional stress. Naturally my rubber is petrified so we’ll need to replace that.

I am spending extra space here (and even more photos on my hard drive) to document the throttle linkages because I have the sense they will be the hardest things to get just right again. Here is the run of linkage along the firewall, from that rubber-sleeved pivot over to the driver’s side.

2638-lonkage-across-firewall.jpg

Here is the throttle linkage over on the driver’s side, just adjacent to the brake vacuum bellows

2639-linkage-drivers-side-firewall.jpg

Here is the linkage section from the balancing manifold, on my bench.

2640-upper-linkage-on-bench.jpg

Here is detail on that front pivot. Looks like these pivots need regular greasing but I don’t see any Zerk or similar fittings to make it easy?

2641-linkage-front-pivot-detail.jpg

Here is detail on the center pivot.

2643-linkage-center-pivot-detail.jpg

Here is detail on the firewall pivot.

2644-firewall-pivot-detail.jpg

Here is the air balancing manifold on my bench. One of the studs in the cylinder intakes unscrewed (on the left).

2645-air-balancing-manifold.jpg

This part cracks me up. The factory polished the side you can see here but the other side has a rough porous finish. The vacuum outlet on the left here just seems to be a restriction and the three links to the carbs are relatively big. The carb tuning has to be somewhat linked through this manifold.

Here is the vacuum outlet end a a view of one of the balancing ports.

2647-manifold-vacuum-outlet.jpg

Here is the vacuum port disassembled. There is another gasket I’ll need to replace. Yep, another stud came off with the nut.

2648-balanicng-manifold-vac-output-assembly.jpg

Here is what the intakes look like now. I believe that is a water manifold above them, attached to the radiator.

2646-cylinder-intakes-after-removing-balancing-manifold.jpg

I expect to pull those off next but I have quite a bit of cleaning and rust removal to do on the bits I just showed you. Not the most glamorous work but it does make me feel closer to this car. Touching, and cleaning up, every little nut and bolt gives me a sense of the machine that you’ll never get if you only drive a working car. It is no guarantee I’ll like the end result but it makes for an unforgettable journey.

And now for this week’s personal buffoonery. BMW Joe and I went of the Saint Patrick’s Day motorcycle ride last week. The start was at Crazy Otto’s in Acton so we figured we’d head over Angeles Crest Highway to Angeles Forest, instead of the droning superslab ride up route 5 to 14 to Acton. Probably the same hour or so to get there but through twisty mountain roads instead of a straight highway. Well, we didn’t figure on the winter conditions up there. We had a week of high temperatures so we figured we were safe. Boy were we wrong.

We got seven miles up Angeles Crest Highway from the 210 exit to Angeles Forest Road just fine. The road was clean and dry. But Angeles Forest was closed. Large barrier signs were dragged across the road just after the turn off. I could have been a landslide but we guessed at ice because it was pretty nippy (I had my electric liner set to “broil”) and it rained the night before. Joe has his GPS working so he says let’s keep going on Angeles Crest. Now my mind wasn’t all there, hadn’t had my coffee yet, so I nod and we head off. See, I know Angeles Crest is not open all the way through Wrightwood to go around the East side of the mountains. There was a sign a few miles back confirming that. So the only turn off that made sense ahead of us was Upper Big Tujunga (yeah, wacky road name) and THAT was just a loop that’d put us down on Angeles Forest, halfway down the mountain. I guess Joe figured maybe the road would be open there but if I had my wits about me I’d have argued for a turn-around right there.

Anyway. We continue up Angeles Crest Highway and some SUV drivers taking bicycles off their trucks give us weird looks as we pass them. What-do-you-know, not a half mile later we hit our first stretch of ice. Not nice white snow and not just a trickle across the road. Actual clear-as-day ice, with a just fine dusting of snow, for a few hundred yards (all the way to the next turn)! We stop in front of this and mull it over. Well, I mull and Joe, who is a child of the northeastern US, just sticks his legs out and chugs up the road. I set my radio to bitch mode. “Joe, I don’t like this! Joe, maybe we should just turn back. Joe, where are we going?” See if Gary or Italian Joe were with us I am certain we would have had a majority wimp-out turn-around right then. Well, Italian Joe only uses race-rubber tires and expensive Italian body panels on his bikes so he’d have turned at the sight of ice.

Sigh. Just before he leaves radio range BMW Joe says, “I have lots of experience riding around with friends on roads like this in Massachusetts.” So I say, “that means you have lots of experience helping pick up your friends’ bikes and calling their wives to meet us at the hospital?” Sigh. Okay feet out, upshift to keep torque low, no sudden moves, and off we go. There are stretches of clear road but as we continue about 13 miles to Upper Big Tujunga, gaining altitude, those stretches get shorter and shorter. Going around turns on ice on two wheels has a real pucker factor. You try to straighten the turn but there’s only so much you can do to straighten 180 degree hairpins.

We arrive at the turn and we look down the road. Upper Big Tujunga looks like a good place to bring a sled. Solid deep white snow as far as we can see! I can tell Joe is mulling now. I’m deranged but not entirely stupid so I turn around. Joe eventually agrees.

You know what has more pucker factor than riding all the way up a mountain on ice-covered roads? Riding back down. It is harder to smoothly maintain your speed. Since you’re idling along in a high gear you tend to accelerate too much just from the slope.

You could say we had the luck of the Irish because we survived without mishap and got to the start of the run, just an hour later than expected and sorely in need of coffee!

March 10, 2008

The dark path

Filed under: 1962, auto restoration, E-Type, Jaguar, restoration, XK-E, XKE — Penforhire @ 7:15 pm

While I continued working on the carbs I also managed to remove the left rear bumper, now that the gas tank is out. No photos because construction was no different than the right, already covered.

Carburetors are peculiar devices. In one way they are fairly simple. You see a bunch of parts but with a little assistance from a manual you can identify everything and you have some idea what their purpose is. But on the other hand, there are always details that make the difference between running okay and — hard or non-starting, rough or racing idle, hesitation under acceleration, fuel efficiency, fuel overflow onto the ground, and spark plug fouling.

I have more experience than I ever wanted to have with what can go wrong when I rebuilt the Bing carbs on my old BMW motorcycle. But when I research service costs to have others rebuild the XK’s triple SU HD8 carbs I choke (ha, ha) on the prices, from $800 to $1500. Okay, so we’re giving it a go on our own, right? To slant the odds in my favor I ordered a recommended DVD on rebuilding SU’s from Moss Motors. I also bought three complete British Superior rebuild kits from an e-bay seller (Atkinson Classic Jaguar). Price was about $170 with shipping, about 20% less than the usual mail-order shops. I also ordered a specialty SU tool kit from another vendor for about $28 with shipping. This has the jet centering tool and some wrenches. Seems like a couple of the SU hex-shapes are indeed Whitworth size. Aargh! Otherwise a good use for my English crescent wrench.

Hmm, these are my first actual Jaguar-specific purchases beyond repair manuals. Well what can a person do while waiting for these purchases? I don’t think I can get into TOO much trouble if I disassemble and clean the carb bits. Famous last words, probably.

Let’s put up a bunch more reference images so you can see what I’m up against. Might even help me reassemble the bits later. Here is an exploded view of the main piston section.

2585-main-needle-exploded-view.jpg

Here is the main body of the carb. The main jet, where the needle rides, is the brass bit in the floor of the body.

2586-carb-main-body.jpg

Here is the inside of the “bell” that is the top of the carb. A smaller piston rides in oil down the center of this to dampen the motion on the needle’s piston. The oil fill point is the brass hex-plug at the very top of the carb.

2588-inside-bell.jpg

Got a little varnish built up in there but none of the nasty corrosion we saw at the carb intake and output. Gives me some hope.

Here’s the top of the needle piston. Not sure yet what purpose that multi-holed brass bit in the center serves.

2589-top-of-needle-piston.jpg

Grimy but again no scary corrosion. Here is an exploded view of the float bowl shut-off, the bits that prevent overflow.

2590-overflow-valve-exploded-view.jpg

These are the bits I mentioned I might replace with something better. That would be called a Grose Jet. Should cost me another $15 or so per carb.

The front carb is unique in that it has a port that feeds vacuum to the distributor advance mechanism. Here are the bits.

2591-vacuum-advance-port-exploded-view.jpg

The hole is tiny, maybe 1/32nd inch or so. There has to be an intentional delay in vacuum transmission to the advance unit because the coiled tube after this hole is at least a foot long. After solvent soaking I used some electrical wire to safely clean it up.

2597-cleaning-vacuum-advance-port.jpg

The carb’s butterfly is screwed to the throttle shaft. That shaft has the most bizarre end-cap arrangement. I’m sure it is all necessary but it smells Rube Goldberg to me. Here are the outermost bits, a press-fit brass cap and spring.

2593-throttle-pivot-end-cap-spring.jpg

It is difficult to pull the caps off without damaging the caps. Hopefully they will be part of the rebuild kit. The next bits are a dished brass washer and a cork seal.

2595-throttle-pivot-dished-washer-cork-seal.jpg

I read somewhere that later carbs use a Teflon insert that lasts forever but requires some sort of accurate boring to retrofit. Accurate? Me? Guess we’ll try the original cork system.

Here is a curious little bit. This is a guide (or maybe just anti-rotation?) for the main jet piston.

2596-needle-piston-guide-split-screw.jpg

The screw has a split tail same as the two butterfly screws, spread like a cotter pin to never back out, because “very bad things” would happen if these bits got loose and were sucked into the cylinder. This guide extends slightly into the open throat of the carb but I’m thinking the piston never rises high enough for it to interfere with air flow.

Here are more images of the linkages of the middle carb as mounted on the engine. The links look tricky, like I’ll never get them exactly right again!

2601-middle-carb-reference-linkages.jpg

2602-middle-carb-more-linkages.jpg

And now some more angles of the middle carb as removed on my bench (I was not thorough enough with the front carb photos) —

2604-middle-carb-on-bench-butterfly-view.jpg

2605-middle-carb-bottom-view.jpg

2606-middle-carb-other-side.jpg

2608-middle-carb-float-side-view.jpg

2609-middle-carb-intake-view.jpg

The choke shaft is a wicked-looking assembly all by itself —

2607-choke-assembly-detail.jpg

Here is where we veer off into obsession and madness. Think back to Return of the Jedi where Yoda says to Luke Skywalker, “Once you start down the dark path, forever will it dominate your destiny.” Well I’m here to tell you that once you learn how to polish metal that looks unrecoverable, as I did on my motorcycle restoration, forever will you toil.

It occurred to me that whenever I see under-the-hood photos of other series one E-type restorations my eye is drawn to the bright trio of SU carb tops, then to the two shiny cam covers, and finally to the golden sheen of the painted block. I dunno about you but that’s how MY eye first takes in the XK motor. I suppose that makes it a foregone conclusion that cleaning the grease off would not be enough. No, I feel the need to polish.

Here is my primary tool, a sewn polishing wheel on a Shopsmith arbor capable of running up to about 5K RPM.

2598-polishing-wheel-emery-grit.jpg

Here you see the coarsest common polishing grit, black emery. This is not coarse enough to remove dings or deep pitting. You must start with actual sandpaper, running from coarser to finer grits, if you want flawless bling. But the emery compound is good enough to remove fourty years of surface oxidation.

Here are the carb bell’s bolts before and after polishing the heads. Note that polished surfaces are hard to capture with a camera. They reflect all nearby surfaces and pick up visual defects or texture that isn’t there. So they always look better in person.

2599-bell-bolt-before-after-polishing.jpg

Here are the floats before and after polishing.

2611-floats-before-after-polishing.jpg

Polishing is one of those jobs where you can get in a groove and hours fly by. Good thing because this next comparison of carb bells, before and after polish, took at least eight hours. For that one bell!

2610-carb-bells-before-and-after-polishing.jpg

I probably should have started with some sandpaper but I stuck to emery compound on the wheel and just worked it… and worked it… and worked it. Then I switched to a different wheel and a finer white compound, skipping a possible brown “tripoli” compound, and worked it some more. Then I finished with an unsewn buffing wheel and Wenol metal polish. There are probably a dozen metal polishes I could have gotten the same final shine with (e.g. Simichrome, Mother’s Aluminum, Autosol,…).

Note I did NOT remove all the deeper scratches and grooves. I need to ruminate on whether to sandpaper or not before tacking the second bell. The thing is, once you start with a coarser grit you force yourself to work back in several steps toward the finer grits. If you skip over too many grits you make even more work for yourself to remove the marks from the coarser grit steps. On this I might have to go all the way back to 320 grit if I wanted perfection. To knock out most of the deep scratches (not all) would require 400, 600, and then 1000 grits, worked over every square inch, before getting the bell back to the polishing wheel. And then I’d still have to run at least the same three wheel steps. I am describing a several-day effort. For one carb bell.

Madness, right? But the parts I’ve done so far sure look good! Maybe I can get Monster Energy drink to sponsor me. Speaking of which, let’s talk about this weekend’s Tivo! The AMA motorcycle races at Daytona had unusual drama this year.

I had no idea Neil Hodgson, who qualified on pole in Formula Extreme (Daytona 200, 69 laps!), lives on the Isle of Man. That is a strange little island where one of the world’s craziest races takes place, the Isle of Man TT. Full-on racing around the island and through the streets of a quant village with sidewalks and solid walls to either side as you scream through it at 180 MPH. Someday I hope to race around the old Nurburgring track in Germany but at the Isle of Man I just want to watch. You think I have a deathwish? Sadly, Neil’s bike self-destructed in this race with only about 5 laps to go and his position was somewhere around 4th.

Then there was Jake Zemke whose Honda had a big wheel mounting issue at the first pit stop, riding in 2nd place at the time, so he took off his leathers! His team-mate Josh Hayes was in first place but HIS pit stops were perfect. He won the race.

But you have to feel even worse for Miguel Duhamel. He had a clutch problem on the second lap, came in for his back-up bike, and worked his way back up to 5th place. There were 40+ riders ahead of him when he came out of the pits! And then with only a dozen or so laps to go the officials black flagged him because although his bike change was early enough it was not also under a red flag. He risked life and limb for HOURS pushing every limit before the AMA made that decision and black flagged him. If I were him you’d have to shoot me with a tranquilizer gun to calm me down.

BMW had a four HP2 Sport bikes in the field for the first time outside of a BMW cup race. Why was it that TWO of them ran off the track on the first lap? This was sort of an exhibition since the engines were stock. In theory they had no chance against the veteran Formula Extreme bikes. Would you believe they came in 5th and 6th (Richard Cooper and Brian Parriott)? Unbelieveable. How cool would it be if they decide to develop the bike and run the season?

But wait, there’s more. Did you see the Supercross race in heavy rain? That was the most gnarly stadium riding I’ve ever seen. Water was up to the axles and that was only if you found the shallow line. One bike got stuck, front wheel in the air looking like a dinosaur in a tar pit, and he couldn’t get it out even with one corner worker’s help! Nobody’s goggles lasted to the end. Chad Reed rode an incredible race, getting OVER a 60 second lead, despite falling over a couple of times and running off course a lot, over Kevin Windham in 2nd place. Oh, but if only Chad’s bike didn’t die just two turns away from the finish line on the LAST LAP! See Kevin, that’s why you never give up.

That’s all for now. Check back for more the good, the bad, and the dirty as it happens.

March 2, 2008

Size matters

Filed under: 1962, auto restoration, car restoration, E-Type, Jaguar, XK-E, XKE — Penforhire @ 9:42 pm

Some thing very odd happened. Remember that special 13/16 inch impact socket I ordered from NAPA? Here it is.

2552-napa-impact-socket.jpg

I put it on the fuel tank drain hex and it felt a little loose. Hmm? I give the impact wrench a few quick trigger pulls and sure enough it starts to round the hex and jams on the nut. I pull it off and put back on my regular 13/16 socket. Snug as can be. WTF? I get out a caliper and measure the impact socket. It is perfect match for 7/8 inch, oversize by 1/16 inch!

I’ve honestly never run into a factory mis-marked tool like this. I know NAPA is not a top-of-the-line brand like Snap-On but c’mon! The counter-monkey at NAPA is as mystified as I am. They quickly confirm my measurement and don’t give me any lip about it. I get to mentioning how I’m not likely to ever need a 13/16th again in my life but I really need it now. Size matters. Turns out 13/16 is a common lug nut size. Who knew?

The next day they get a replacement impact socket from a warehouse and double-check its size. I put it on the fuel tank drain and it fits nice and snug. A few seconds full-on with an Ingersoll Rand 231C 1/2″ impact wrench and “rat-rat-rat-zooooom!”

2558-tank-drain.jpg

Gosh I like powerful tools! I’m still curious about why anyone would make a long drain cap like this, instead of having a plug at the very end. Anyone know?

Inside we find petrified sludge and, apparently, where prehistoric wooley gaskets go to die.

2559-gunk-in-drain.jpg

There were bits of hairy gasket spread throughout the sludge. By the way, this sludge just laughs at Engine Brite. I ended up chipping it out bit by bit. The last residue was cleaned up overnight in my no-longer-legal-to-buy parts cleaner solvent (thanks again Brad!).

Here’s a view of the entire tank balanced on a front tire.

2566-fuel-tank.jpg

Big and heavy. I am uncertain if it can be salvaged. The interior has horrible gunk build-up. But I’ll probably give it a go later since replacements are wicked expensive. For now, out of the way on a shelf. Woo-hoo, mission accomplished!

Here are some documentary photos of the cleared-out boot —

2568-empty-boot.jpg

Left side —

2569-boot-left.jpg

Forward section (I don’t imagine that speaker is original!) —

2570-boot-rear.jpg

Right side —

2571-boot-right.jpg

What should I pull off next? I know. The triple carburetors are a complicated bit of kit that would be useful to remove and restore separate from the engine. I have this wild hair idea to convert the engine to fuel injection. Along with electronic ignition it would make daily driving more reliable. But my research indicates only a few expensive conversion options and none seem popular among owners. And the conversion is obvious at a glance under the hood. I’ll need to decide before I spend a lot of money restoring the carbs but that won’t stop me from blowing a bunch of my labor on ’em first!

I read the repair manual section on carb removal but it has a whole lot of “disconnect this, that, and the other” without actually showing me what those are. Figure I’ll just wing it until I get to head-scratcher.

Here is the front carb. Note the coiled copper vacuum advance line from the distributor.

2553-front-carb.jpg

Here is a bolt (interior threads) holding a “banjo” tube on, similar on each carb.

2556-overflow-banjo-assembly.jpg

At first I couldn’t figure why the three banjo-head copper tubes are not connected to anything. Duh, they are overflow tubes on the float bowl. If the float bowl fills and does not shut off incoming gasoline will dump out these overflows. I suppose I need to make sure the tube ends are pointed away from anything especially hot, eh?

Here are the banjo bolt parts from the front carb on the bench.

2557-overflow-parts-on-bench.jpg

The seal is clearly shot. Each carb has that middle plate with an engraved number. The numbers are not identical. They may indicate jetting or ? Anyone know what they mean? Here are all three fuel feed lines on the bench along with the float bowl tops. This also shows the incoming banjo connections with wire mesh filters and a spring.

2561-fuel-feed-lines.jpg

The incoming gas line comes from a glass bowl mounted to the firewall with, you guess it, another banjo connection. I imagine these cars must have leaked often. Modern cars use compression fittings on most fluid lines. Maybe they are improved today or less expensive, because there ARE compression fittings on this car, such as the two nuts you see below the tee in this picture (or is that not original?).

Here’s a close-up of the float bowl tops.

2562-float-bowl-top.jpg

That forked lever inside pushes up the shut-off valve when the float rises. I seem to recall reading about an improved shut-off valve I should look into.

Most of the carbs, like most of the car, are pretty grungy. Here is one float bowl top as-is and then after some significant TLC.

2563-grungy-top.jpg

2565-cleaned-up-top.jpg

I scraped off a lot of caked-on goo and then soaked it overnight in parts cleaning solvent. A tooth-brush type brush helped clean out the raised lettering.

As you may recall, my air filter housing and intake to the carbs was already off the car (we’re still looking for that housing!). The carbs themselves are each held to cylinder twinned intakes by four nuts. The location is very inconvenient (one nut shown by red arrow below). Not enough room for a socket or even a box wrench. You have to work a tiny arc with just an open end wrench.

2572-carb-mounting-nuts.jpg

Maybe there is an easier order but I took off the carbs individually, removing the connections to the upper throttle linkages. The choke linkages are below the carbs. Here is the front carb choke linkage.

2574-front-choke-linkage.jpg

Held on with a cotter pin, just like the rear carb linkage —

2576-rear-choke-linkage.jpg

And here is the middle carb linkage —

2575-middle-choke-linkage.jpg

At this point the front carb made it to my bench —

2577-front-carb-on-bench.jpg

Here’s some yummy corrosion after the butterfly. Probably an indicator of things to come as I disassemble the carb.

2578-corrosion-at-butterfly.jpg

The pink around the hole is just residue from the gasket I had to scrape off. There is enough irregularity on the sealing surfaces of BOTH sides of the carb that I expect to lap them smooth over a piece of glass.

Four flat-head screws hold the float bowl and bottom-of-carb assembly on.

2580-float-bowl-off.jpg

Here is a partial disassembly of the base of the carb. The spring pushes up on a diaphragm. Plenty of orange powder (rust?) in the base.

2583-carb-base-partial-disassembly.jpg

Here is the diaphragm separated from the upper section.

2584-diaphragm-out-of-base.jpg

Mine is pretty crunchy so replacements are clearly necessary.

Well that is quite a bit of progress for a short time. Figured I’d post now instead of waiting since another weekend should make for a VERY long post. Don’t get used to it. It’ll take me a week or two just to finish cleaning up what I’ve removed!

Don’t forget that Formula One racing starts up again in a couple of weeks. Meanwhile I’ve been following World Superbike racing. Did you see Haga shake his fist at a rider at Qatar last week and instantly high-side? How about the Honda rider in the 600 cc class that high-sided and managed to take out his team mate, who just happened to be right behind him?

And this week at Phillip Island, did you see Biaggi crash out of BOTH 900 cc races?! He had an awesome charge through the field in both races (no qualifying time, some bike problem) but just couldn’t settle for podium finishes. Too much pride in that one, not to settle for 2nd after tearing up the track to get there. But I never liked him from his MotoGP days anyway. How about Fabrizio?! He stalled at the start of the first race and got swiped by a last-row rider. It tore his boot off and he’s carried back to the garage on a stretcher! He gets back on grid for the re-start and finishes third (with a foot that had to be broken)! And Honda’s luck continued. DURING the red flag following that starting incident one of the Honda riders runs into the back of HIS team mate and a THIRD Honda bike is forced into the gravel (somehow the two crashers made it onto backup bikes for the re-start). Think the team manager was happy about that? Xaus and, I think, Nieto were banging fairings with rough pass and re-pass for half the 2nd race. Of course Bayliss won BOTH races with an elbow that took seven stitches from a practice crash. Those guys are tough and a lot of fun to watch!

You can catch some video replays at http://www.worldsbk.com/pubb_EN/index.php

February 25, 2008

I am a human Zerk fitting

Filed under: 1962, auto restoration, E-Type, Jaguar, restoration, XK-E, XKE — Penforhire @ 8:00 am

First I have a little correction from a prior post. BMW Joe actually DID win the Liar’s Poker high hand award! He e-mailed me this picture of it.

2540a-joes-poker-award.jpg

Pasadena m/c club’s rules said four of a kind in the same suit beats five of a kind. So this hand is rated as four ace-of-clubs. That’s not the Hoyle I know but a win is a win. Now I have to ask, why is it that when I win a high hand award I get an ink jet printed page for an award and when Joe wins he gets this nice plaque and some real prizes? I know, sour grapes. But at least one of these aces was mine…

Next up, we investigate the mystery of the Heineken “draught keg.”

2541-heineken-keg.jpg

Yep, this is the one advertised as coming out of the chest cavity of an attractive female robot. It is five liters of fine Heineken lager with a built in carbon dioxide pressure-regulating system. They are SO proud of this I think they patented it and the amazing thing is how the whole rig is disposable. Well, the keg is mostly steel and they recommend recycling. But the critical point here is how it dispenses five liters of beer with no pumping and maintains a CO2 blanket that guarantees fresh draft-style taste for at least a month. My local Costco stores sell this bundle of joy for about $16. Mine was still performing its duties so Brad volunteered his empty keg for an investigation.

My 3″ cut-off wheel sliced it open like butter.

2542-siphon-tube.jpg

Notice the simple siphon tube. Nothing special there. Here is the CO2 source, normally stuck to the bottom of the keg.

2543-co2-source.jpg

This is the special goodness, well, aside from the beer. Here is the top section of it pulled apart.

2544-pressure-regulator.jpg

The arrow points to an air piston, a simple o-ring sealed disk that fits into the cap at the top. Backpressure from this piston presses down on the gas release valve and maintains mostly stable pressure inside the keg. The white cylinder is filled with some unknown solid, sounds like beads or grains. I cannot tell if the cylinder was partly filled with liquid CO2 or if the beads just absorb-and-release some gaseous CO2. Liquid CO2 generates about 800 PSI at room temperature so I’m thinking they avoid the liquid and stick to gas. But I dunno. To me the stunner is how this reservoir and regulator are cheap enough to be disposable. Typical CO2 tanks (aluminum alloy or steel) and brass-body regulators each cost more than this whole keg.

There you have it. This week’s science project. I know, you sure know how to go on about beer, eh? Well some actual XK-E work was performed.

You know that “body reinforcing plate” I needed to locate as part of gas tank removal? Here it is.

2546-body-reinforcing-plate.jpg

There is a dead spider on that upper left nut, making sure it doesn’t loosen. Now this picture makes it look like an easy access item. Looks can be deceiving. I was on a creeper looking straight up through a small gap in the independent rear suspension (IRS) shell. My chin is about an inch from the lower IRS plate and that gives me the claustrophobic willies, even though the car is sitting safely on four ramps. The two disk brakes are just out of sight to the left and right. There is no enough room to get an air ratchet up through or around the IRS. I tried and the trigger got depressed, with the air exhaust raining greasy debris from the IRS down on my face. Even my normal ratchets can’t get purchase on the nuts and room to swing, not even with a knuckle joint.

I ended up teasing these four nuts off with an open end wrench. Not just that simple though. I could only get a grip at the last inch of so of wrench, it was quickly covered in grease, and maximum rotation was about an eighth of a full turn.

This is one of those assemblies where proper order would help. It would have been infinitely easier if the whole IRS unit was removed first. But I don’t plan to remove that for a while since I’m happiest using the wheels to lift the car on ramps, rather than relying on jack stands-to-body to hold up the rear end while I’m under there. As it is, this was a dismal hand-cramping job that must have taken an hour. Did I mention the whole IRS unit is coated with road slime?

2547-greasy-palm.jpg

This photo doesn’t do it justice because both of my arms looked like I reached in a barrel of sludge up to the elbows. All the tools I tried had to be carefully cleaned, more goobered up than anything I have done before. Ugh! At least there is something intensely satisfying about wrestling with a greased pig and succeeding. Here is the gas tank bracket that was held on by those nuts.

2548-gas-tank-bracket.jpg

Yeah, if I remember, mount the gas tank before the IRS.

Now at this point, according to my repair manual, the tank should be ready for removal. Um… no. It seems the manual was written for other years even though it gives unique steps for removing the gas tank of the early 3.8 motor. It looks like later years have an external tank that drops down? There is just no way in heck my tank is getting lifted out of there unless I remove one more part. The bottom drain.

2549-gas-tank-drain.jpg

It is just too long to pivot freely. The tank has to rotate to free the left side, can’t lift straight up. The red arrow points to the base of the drain. If I understand the parts manual correctly this cylinder is one piece, not a separate nut at the bottom. That hex shape at the base is an fairly odd size 13/16th inch. I happen to have a 13/16th socket.

First I got a siphon tube and removed as much of the nasty varnish as I could from the tank. I’m sure more will splash on me when I open the drain. I got out a ratchet and then my breaker bar but there was no joy. I can’t break it loose. Sigh. It also just so happens that I do NOT have a 13/16 inch impact socket. Off to my local NAPA Auto Parts. Can you believe $9 for a single short impact socket in 1/2 inch drive? They want $30 for a swivel-joint version! And none are in stock. They should get it in the middle of the week.

You know what is going to REALLY bum me out? When I get this socket but my impact wrench still fails to break the drain loose. But I’ll have that 13/16th impact socket forever. As you can imagine, I’m already visualizing my use of a cut-off wheel or hack saw for when I fail to break this loose. Of course all those sparks are probably a bad thing, cutting into a tank wet with old gas, eh?

Stick and move. Time to pull on something else. How about the rear fog light?

2551-rear-fog-light.jpg

At least that is what I assume that light under the license plate is for. It is held on by two slotted screws. The bulb base is another one of those cardboard inserts. I can’t show you the disassembly because it will not disassemble. I believe this one was bashed, backing up into something. Probably why there was no lens on the assembly, eh? That bulb is not broken but there is no way it is coming out of there. The base looks bent.

I also can’t tell what color the outside housing is supposed to be. Way too corroded. Any series one owners out there? Is it supposed to be body color, or black, or ?

February 10, 2008

Congested pipes

Filed under: 1962, auto restoration, car restoration, E-Type, Jaguar, XK-E, XKE — Penforhire @ 7:54 am

I apologize in advance for a weak XKE update this week. Everything I have to say about the Jag went down and was prepped last weekend. This weekend I’m enjoying some sort of severe chest cold. Otherwise I’d be out with Joe on another ride today, the Sweetheart Ride, and I might have done more to the Jag. By the way, the annual Sweetheart Ride is always ahead of Valentine’s Day. So I always get a reminder. This is your reminder. If your wife says to you, like mine did this year, “honey, this year let’s skip the Valentines Day thing” well, you just nod your head and as soon as she is out of earshot run, don’t walk, to your PC or phone (1800Flowers.com and a local fru-fru restaurant work for me). You were warned!

I should mention how much I enjoy my prescription cough syrup with codeine. At night it turns me into a big Gumby doll. Instead of dry-coughing miserably for hours I can fall into any Twister-board position and the next thing I know, I got some sleep! Oh yeah, I’m pretty sure I got this cold from my wife since she complained about a sore throat first (though her illness is not so severe). I have allergies ever since I got old, the sort that give you a runny nose. So I’m used to having sinus infections. But I haven’t had a chest cold in forever. Can you believe I’m looking forward to a “productive cough?”

There are some odd side effects to codeine. The bottle says not to operate dangerous machinery and I believe it. I’m probably taking a risk just typing this now. I was looking in the fridge for some soda and the first thing I see are the cans in the door. As I’m pulling one out I notice an unopened 2-liter bottle of the same stuff on another shelf. Hmm, I know enough to drink the 2-liter bottles before consuming the cans (which can be taken out on the town). So I grab that big bottle, open it, and pour myself a cold one. As I’m putting it back, I notice an opened 2 liter bottle of the exact same soda, not hiding in the back but literally adjacent to the bottle I grabbed. How’s that for tunnel vision? And I know for a fact before I went to bed last night I checked to make sure my Sunday alarm was off, previously set because I intended to get out riding with Joe early. Well, sure enough come 5:30 AM it goes off! Grrr.

Okay, on to other congested pipes —

After talking to Bob about the stuck exhaust (see his comment on the last post) I decided to exercise some air-powered pursuasion on it. I don’t actually have a reciprocating saw and a hacksaw seemed like too much effort so I turned to a 3″ diameter cut-off wheel instead. After a few hot spark showers and curses I put on some gloves and a jeans jacket to finish the job. Turns out one of the header flex sections was already cracked and easy to separate.

If you are thinking of major vehicle work here’s some advice. Don’t wait as long as I did (middle of a motorcycle resto) before getting a decent air compressor and related tools. They make so many things easier. Pneumatic tools are lighter, stronger, and less expensive than equivalent electric tools. Most of my individual air tools were dirt-cheap from Harbor Freight. I keep them oiled and so far they are still doing the job. I only paid real money for a plain Ingersoll Rand 231C impact wrench because I needed real brute force on a nut on that last project that resisted a cheater bar and a smaller impact wrench Brad gave me.

When I pulled the exhaust out and stood it up a bunch of black powder ran out the pipes.

2536-exhaust-internal-crud.jpg

Nice. Probably contributed to the 40+ pounds of weight the pipes and mufflers seem to weigh! Here is the section, standing upright.

2537-exhaust-below-flex-section.jpg

Here’s a close-up of the rear-most exhaust bracket, since I think I can re-use it though it is slightly bent.

2538-rear-most-exhaust-bracket.jpg

Here is one of the horseshoe-shaped clamps I mentioned in the last post.

2539-exhaust-horseshoe-clamp.jpg

It still doesn’t want to come off so I’ll probably just replace these when I get a new full exhaust. I’m a fan of stainless steel exhausts and I can’t imagine it’ll weigh more than the original!

One thing I haven’t talked much about is how I am reconditioning as much hardware as possible. Most of the rusty and crudded-up bolts need to have a die run over them to clean ’em up. This U-bolt intereferes with the normal die holder so I have wrench it.

2540-die-on-exhaust-u-bolt.jpg

Just one of those not-so-little tasks that seem to eat up hours.

BMW Joe and I went on the Pasadena Motorcycle Club’s “Liar’s Poker Run.” This ride was delayed a week by heavy rain but it was still cold and a little wet. We started and ended at the Pasadena Yamaha dealership.

2530-liars-poker-start-finish.jpg

It was a unique ride in several ways. They had the usual well-managed competition using a spinner at each checkpoint to choose playing cards and a look-up table to translate that into points (1-52), with prizes for low and high hand. In addition to that they had, well, an anything-goes competition using actual playing cards from at least one full deck at each checkpoint. At the end of the ride you could combine cards with as many people you wanted to compete for a high hand. At each checkpoint you had to announce whether you wanted to take the “macho” route to the next checkpoint or the “normal” route. You did not know the actual routes until you announced (unless you could wheedle it out of the staff at that point). The decks of cards were stacked so the higher cards went to the macho riders, or at least those who so announced (hence the liar’s poker aspect, encouraged). The macho route was indeed longer and harder.

The first leg was from that Pasadena dealership to the intersection of 15 and 138 (near the top of the Cahon pass). We were puffed with self-confidence so Joe and I said, “give us the macho route.” The normal route was a simple highway run East on 210 to 15. Our route sent us up Asuza Canyon and over Glendora Mountain Road. This is usually one of the better twisty rides near LA. The roads were damp and too much mud was randomly distributed. We went quite gingerly over the mountain! By the time we got to the check point at a gas station near 15 and 138 we also got some rain. Seems that only a half-dozen or so riders took the first-leg macho path so many riders passed us using the other path.

2531-rain-at-15-138.jpg

Turns out that by this point in the ride the following “macho route” (backside of Angeles Crest Highway) was known to be iced! So while we asked for self-abuse we ended up riding the same path as the others. In any event I was VERY glad to be wearing an electric jacket liner and gloves.

2532-snow-in-the-high-desert.jpg

Yep, snow in the high desert. A fellow rider told us the temperature was 45 degrees at the prior stop and it got quite a bit colder after that, call it 40 degrees even (without windchill)! Only Gary’s bike has a thermometer between the three of us and he was off skiing. Joe was starting to get surly whenever I mentioned I had to twist the dial up a bit. He’s got heated handgrips but that’s not quite the same. Also, I had bodged-on wind deflectors from a Suzuki V-Strom on my FJR’s grips and I was STILL feeling the cold. Two thumbs up for Gerbings electric clothing!

At the end of the ride Joe was a contender for high-hand for the legit competition but someone eked out a better total. On the liar’s side, physical cards, I had a pair of aces. Joe had another ace. We found Karyn and she had yet another ace. Woo-hoo, four aces! That was already not enough to win. Somehow, keep in mind the spirit of this competition, Joe, um, found another whole deck of cards. I believe we ended up with four aces of clubs (oddly rated higher than five-of-a-kind in this event) but we still did not win.

On the other hand, I made out like a bandit. I won the 50-50 raffle, a $20 prize. And I got one of the better door prizes, a Harley Davidson blanket (shown here draped on a couch).

2533-harley-blanket-swag.jpg

I’m not really a Harley guy, though I look it, but Julie was curled up happily with it later that night.

Here’s the ride pin —

2535-liars-poker-run-pin.jpg

See you in a couple of weeks, if I’m still alive…

January 26, 2008

New year, S.O.S.

Filed under: 1962, auto restoration, car restoration, E-Type, Jaguar, XK-E, XKE — Penforhire @ 5:31 pm

So I know it has been a while since my last post. See, I’m trying to ease you into a pace that I can sustain. Happy 2008 to you.

My father-in-law found a very useful part in his garage.

2499-air-filter-manifold.jpg

This is the manifold from the air filter to the carbs. I imagine it is a fairly expensive part too! Now if only he can find the air filter box…

Here is one of three bolts holding down the gas tank. This one is at the left rear, looking at it from behind the car.

2501-corner-of-gas-tank.jpg

And here are the pointy bolts themselves —

2502-gas-tank-bolts.jpg

This means the gas tank can come out, right? Ummm, no. It has a half-inch or so of motion but is not about to slip out. More to do first.

Here is the latch inside the boot’s rear edge.

2510-boot-latch.jpg

Believe it or not, that also has to come off. Note the groovy corrosion and overall dinged appearance. Why do I get the feeling I should have left the gas tank as the very last thing I take off the car? Here are a couple of more teardown reference photos.

2512-latch-on-bench.jpg

2514-latch-pieces.jpg

This might be a good item for me to bead blast clean and hammer flat before re-painting with some Krylon.

Here is the underside of the gas filler cap.

2503-gas-fill-cap-underside.jpg

Not too horrible, aside from the fully petrified rubber sealing disk. That’ll have to be replaced but maybe I can use the old one as a cut-off wheel! Here is the top side of this gas cap.

2504-gas-fill-cap-corroded.jpg

Not looking too happy. But you’d be amazed what a few hours of polishing can do —

2505-fill-cap-polished.jpg

The picture looks better than the actual part. There are too many big pores through the chrome finish. It’ll corrode again in a heartbeat. I may live with it. After all, it does live underneath a body door-panel.

As long as I’m messing about in the boot I might as well take off the rear license plate.

2517-rear-license-plate.jpg

Note the year of the last valid registration, 1979! I hope my father-in-law can find the missing front plate but I suppose I can always purchase replica plates. I discovered another seemingly odd design detail. Here is the inside of the boot where the plate is bolted. The arrow points to one of four open slots for those bolts. Sorry about the focus but I’m too lazy to re-shoot.

2519-license-plate-slots.jpg

Yep, there are four plain slots straight through the boot’s rear wall. Haven’t the English thought about corrosion seals or maybe just an external welded bracket?! I get a Sawzall vibe from seeing those slots, like something I would do myself with the wrong tool.

Okay, gas tank is still stuck in place. I put the rear tires of the car up on two more plastic ramps so I’d have room to roll around safely underneath the car. In case you’re wondering, I just used a floor jack under the rear IRS to lift it all, with a chunk of 2×4 wood on the jack.

Here is the bottom drain of the gas tank, poking through the bottom of the boot.

2520-gas-tank-external-drain.jpg

Seems to poke way out, doesn’t it? The bottom bolt is just about flush with the IRS frame you can see ahead of it in this tilted-up perspective. Seems to stick out excessively, like you could conceivably back up onto something and tear it off! And the repair manual does not suggest you have to remove this drain section to remove the tank. Me, I’m thinking this is preventing some of the motion I need to get the tank out. There is some sort of gas tank attachment “stiffening plate” I am supposed to be able to unbolt through the suspension (left wheel well). The manuals have no images of it and I honestly haven’t found it yet. They might just be hidden under some sludge. We’ve got sludge! I’m sure this is one of those things that, after I get the tank out, seem really easy to understand in hindsight.

Anyone have gas tank removal advice for a mechanical monkey?

While I’m rolling around under the car I thought I’d remove the exhaust pipes because they broke off the hangers years ago, drag on the ground, and are sort of in the way. Here is one of the sludged-up clamps that tighten over the slip-fit unions.

2523-exhaust-pipe-slip-on-clamp.jpg

There is another style, sort of a horseshoe with a single straight pinch-bolt. I’d show ’em to you but while I removed the bolts the horseshoe itself must be spread to slip free of the exhaust pipes and I haven’t found a way to lever those apart yet.

Here is a photo showing a broken length of wire hanger and a tab for the exhaust pipe.

2524-exhaust-wire-hanger.jpg

I am not convinced this is an OEM hanger-wire. Anyone know? Seems like a bodge to me. There are four locations, tabs with holes, where someone wired up the pipes (all now broken). Naturally enough, after loosening all the clamps none of the slip-fit exhaust tubes want to slide apart. Nothing budges, even with hammer knocking and prying on the slip-over sections. Why would I image they should? They are probably rusted together. I’ll give it a bit more effort but I am sorely tempted to whip out a cut-off wheel and just be done with it. I do plan on replacing the corroded exhaust entirely anyway. Just seems like cheating to resort to pure destruction.

Any suggestions? Should I heat the overlap sections red-hot? Maybe squirt some Liquid Wrench onto the joint as it cools? Here’s where it may be a bright shiny new year but I’m facing the same old same old in the garage. Every time I walk from the house into the garage the car shows me this.

2529-dragging-exhaust.jpg

Maybe I’m paranoid but I’m starting to think that exhaust is flipping me the bird.

While I was rolling around I got a better look at the underside and I spotted some interesting ugliness to share.

2525-passenger-side-underbody-damage.jpg

This is the bottom of the car just underneath the passenger side door. I drew a red line to indicate where the whole section is supposed to be straight and smooth, not wrinkled like a prune. SOMEBODY ran this ship aground! The surface is badly warped and, well, mountainous. I’ve got to ask dad about it. Maybe mom did it. You can’t tell me that whoever did it did not notice it. The car had to land hard on a curb or something similar to do this much damage. It is old damage, fully covered in road grime, so it has nothing to do with the little shunt at the end of this car’s life.

My body repair cost just went up eh? I am not sure but I believe the unibody construction is a box-section right here for strength. If so, this whole under-door panel might need replacing or more complicated repair, rather than a simple cut-weld-grind panel repair. Geez I hope the body doesn’t collapse on me while I’m under there!

Here endeth the lesson. Well, at least the car stuff. Along with wrenching I managed to do a few other interesting things since last we spoke. I mentioned I was going to brew a batch of weizen beer. And I recall mentioning that my home stove fit my 10 gallon pot but it barely had enough heat to keep a rolling boil in over three gallons of wort. Fixed that.

2500-new-propane-burner.jpg

This propane burner is rated somewhere north of 65K BTU’s and it heated a batch of wort to a boil in a VERY short time. Not a small bit of kit (that is the 10 gallon pot on it) but I am happy. Master of the flame.

Here’s another step of the brewing process, siphoning the beer from fermenter to a bottling bucket.

2509-beer-bottling-day.jpg

After beer is fermented it is important to avoid adding oxygen (air) to it. So we treat it gently to not splash or agitate it until it is bottled. The glass fermenting bottle is a bit messy in this photo because I had a “blow-off” incident with the air lock, something common to brewing wheat beers. The yeast got suddenly aggressive over the second or third night of fermenting and it sprayed out through the small air lock I was using. You are supposed to use a large-tube-into-bucket-of-water air lock for fermentations that may go into overdrive like this. I knew this but thought I would have time to catch it ahead of time. Learn the hard way. That’s me. We’ve got another week of bottle conditioning to go before I can say if this is any good or not (and before you locals can try it). Next batch planned is an American pale ale.

BMW Joe and I also managed to go on another club ride, SC-MA’s annual Soup Run. Here are about half the bikes at the end, at a park somewhere near Canyon Country.

2506-soup-run-bikes.jpg

The idea is everyone brings a can of soup. At the end of the run two pots are prepared, red and white, by mixing almost all the cans.

2507-soup-run-soup.jpg

Unused cans are donated to a local food bank. Now I know this sounds nasty, mixing every odd flavor of soup (mostly Campbells), but every year it tastes better than you would expect. It probably doesn’t hurt that we all rode four-plus hours prior to sitting down to our odd soup lunch.

I managed to capture something extra-strange while I was slurping my soup —

2508-terrier-in-swing.jpg

That’s some kind of terrier in that swing. It didn’t jump out, as the swing was really swinging, but the tail wasn’t wagging and I thought I heard Abe Lincoln’s voice saying, “help me Spock” (obscure Star Trek reference).

Well that’s a wrap. Joe and I were supposed to go on the Pasadena m/c Club’s Liar’s Poker Run tomorrow but rain is definite and So Cal’s higher elevations are snow & ice. We’re postponed at leats a week. Soooo, I have to go to my mother-in-law’s birthday party tomorrow instead. I had a perfect excuse not to attend… but now? Pray for me.

« Newer PostsOlder Posts »

Blog at WordPress.com.