Where were we? Oh yeah, I wanted to remove the left rear bumper. And one thing leads to another.
The fuel tank has to be removed to access two of the three bolts holding the bumper. Absurd, but the tank has to come out anyway. To get the tank out I have to finish disassembling the boot and the boot lid is hanging in the way. Maybe it needs new springs but it doesn’t hold open firmly.
So… off comes the boot lid.
Here is the latch mechanism on the boot lid. It has an odd stack of shims, probably to place the latch precisely.
The boot rubber seal has the consistency of cardboard now. I pulled it off as it seems to be held in place only by old glue. The boot lid is more evidence of the heavy gauge of sheet metal used back then. This thing is heavy! An aluminum or carbon fiber boot lid would save noticeable weight. I can’t believe how light the aluminum body racing cars must have been if THIS car is around 2800 lbs.
The boot interior has false “walls” on the left, right, and rear. These are each wedged into position, held in place by several small screws.
These look like leather but may be veneered cardboard. Or does solid leather age and separate like cardboard?
Here is the fuel level sensor mounted on top of the fuel tank.
Here is the lid of the fuel pump, also on top of the fuel tank.
You would think that removing all the bolts would free these to be extracted from the tank. That would be true in my ideal world. But where I live, on my planet, where my father-in-law left a full tank of gas sitting for decades, the gas tank turned into a mostly solid geode-like rock. I had to rip and tear the fuel pump and level sensor out of the tank.
Here’s a close-up of the fuel pump.
Nasty! Like the creature from the black lagoon. I had no idea there is that much solids content in gasoline. It smells worse than ordinary gasoline, hazardous, like it already gave me cancer. I took it to work to gross out some co-workers. The first thing that crossed my mind was this might be one of those things where instead of cleaning some of it up to re-use, I just call up a parts desk somewhere and order a whole new widget.
I haven’t gotten the tank out yet but some folks are thinking it may be a lost cause too. Anyone know what to clean this up with? It’d take a lot of expensive carb cleaner! Maybe mineral spirits or ?
For the new year I resolve… never to let a full tank of gasoline sit for decades. Shouldn’t be too hard to do eh?
I cleaned up the level sensor and took a closer look at it. It was not technically sealed. Undo two screws and the lid pops off.
By examining the contacts I deduce that this must operate in rheostat mode (as opposed to a voltage divider). Gary says all old level sensors worked this way. I spent some time with this sensor because it is very close to the potentiometric sensors I do engineering around for a living (wirewound, conductive plastic, and cermet elements).
The nonlinear wirewound element and wiper are in excellent condition.
I don’t see fluid residue inside here but there also was no gasket or similar seal on the sensor lid?
The lid has a “collector” piece riveted in place. It looks like a bar of plain copper but maybe it was plated with something. It shows heavy wear at the full-tank position, where it probably spent most of its life.
Since the signal is conducted through the metal lid I find it odd that they riveted a separate part onto the lid. Why not collect the signal onto a one-piece lid? Maybe the materials were less expensive this way. I may need to buy a new sensor because the float pivot is sticky, the float itself is corroded, and the collector is worn.
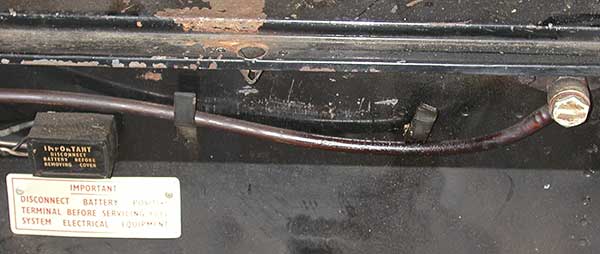
Back to the boot. The electrical connections to the fuel pump run through a rubber box at the back wall of the boot.
This must be a method of reducing fire potential during servicing? Inside the box are two insulated junctions.
The these are unions. The wires all end in “bullet” type connectors that snap into the union ends. Seems like a lot of effort to move the spark potential only a foot away from the gas tank?
Here’s the rest of the fuel pump output run along the back of the boot.
I haven’t taken apart any of the banjo bolts yet. They look guaranteed to leak after disassembly!
The fuel filler is on the left side of the boot.
I had to remove the cardboard wall to get to it. There are two hose ordinary clamps holding a short rubber tube between the filler neck and the tank neck. Better make sure those seal properly when I reassemble or else every time I fill the tank I’ll be leaking gasoline into the boot!
According to my repair manuals I’m down to just three bolts holding the gas tank to the floor of the boot.
Oh yeah, my beer was a smash hit at the holiday family gathering. I’m almost out so I must schedule another brew wort ASAP, a German-style weizen (wheat beer) this time. If I can only shake my holiday cold. Seems like I catch one every year from some random family member. I had to pass on a classic motorcycle gathering in Pasadena this morning that Gary went to. The BMW /5 would have fit in nicely! See you next time in 2008.


Leave a comment