If you are easily offended by my misappropriation of British slang or my future slurs against Saint Lucas you better stop reading right now. Note Joseph Lucas started the business in the 1860’s so we’re not insulting him so much as tossers who continued his company.
The response to my restoration announcement was fantastic on the Jag-Lovers board. There are many enthusiastic E-Type owners who struggled through their own restorations and contacted me directly. Even elsewhere (e.g. Honda S2000 owners) the classic car crowd just boils out of the woodwork when the topic was raised. The BMW motorcycle crowd was helpful during my R75/5 restoration but the feeling was more lone wolf. Maybe that’s just the nature of bikes and BMW airheads in particular? The modern BMW car crowd, another group I deal with, is downright apathetic by comparison. Too many owners who are not enthusiasts. Or as Brad called it, not (Meguiar’s) “car crazy” enough.
I am especially encouraged by photos of XKE’s that were worse off than my starting condition and now look stunning. Let me direct you to one example from an owner that contacted me — http://www.xkedata.com/cars/detail/?car=878152
Jim has plenty of photos of his most excellent restoration but check out how it started — http://www.xkedata.com/gallery/zoom/?id=59656 My car starts out pretty good by comparison. You might not notice this but his chassis number is only 104 away from mine.
Think that is close? I got an e-mail from Geoff in England whose chassis number is 878237 (he says build date Sept 26th, 1962). That’s only 19 cars away from mine! They probably “saw” each other in the factory. His was converted to right hand drive by a previous owner so the proximity of S/N confused me until he mentioned that.
On to some actual resto work!
I started by removing the front turn signals. Both lenses were busted and painted over so I have no choice but to replace them. Here’s the right signal housing —
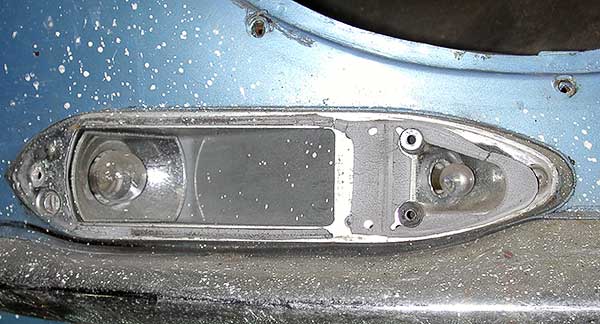
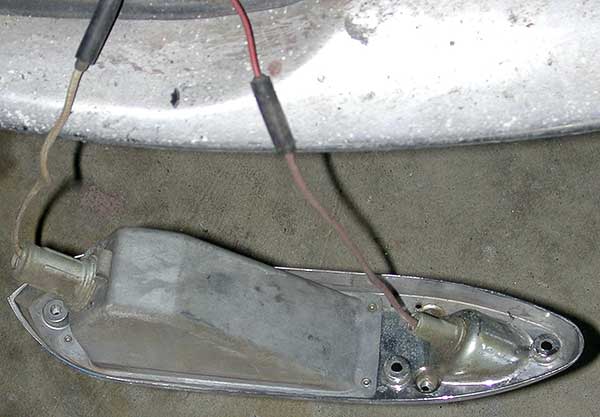
Some more obvious screws hold it in place. The gaskets on both side of the housing (rubber under base, seemed like foam under lens) were completely shot and fell apart on disassembly. Here’s the wiring to the signal (and running light?).
This here was my introduction to Mr. Lucas. You may recall that whenever something on my BMW R75/5 didn’t make sense I blamed an imaginary design engineer named Hans. I even found some German slang words to call him. Well I’m sure even BMW’s village idiot got quite a chuckle seeing some of the designs of older English cars. If you were me you would expect those turn signal lamps to be twisted into now-common bayonet mounts with wires screwed or crimped in place. Sh’yea right.
Here’s the odd base of one of the lamp sockets, right when Mr. Lucas first said hello to me on this job —
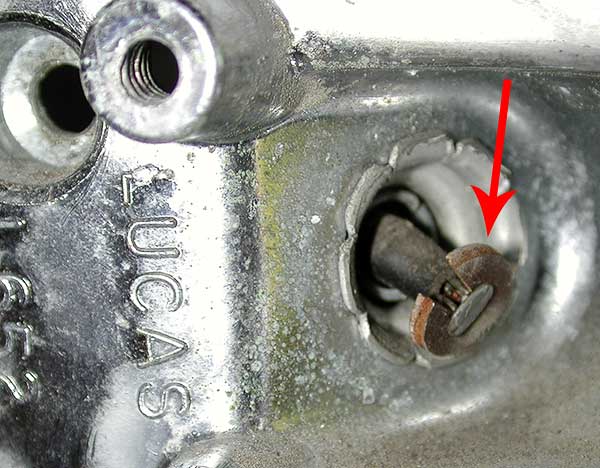
This is some sort of particle board with a metal rivet stuck into a slot. A spring is trapped between the signal housing and the particle board The turn signal housings cannot be removed without disassembling these. Upon disassembly the particle board bases naturally convert into dust! We’ll see how much replacements cost. I can see fabricating my own with a Dremel tool and some bare G10 or FR4 printed circuit board.
Someone in England thought they were the dog’s bollocks when they designed these, eh? Wanker!
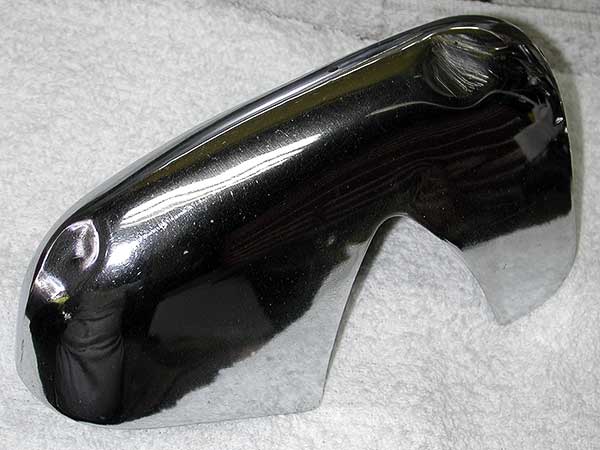
The turn signal housings cleaned up pretty well with Nevr-Dull wadding so I’m not absolutely certain I’ll rechrome them. If I don’t they will corrode quickly in the future, through small pores in the plating from prior corrosion.
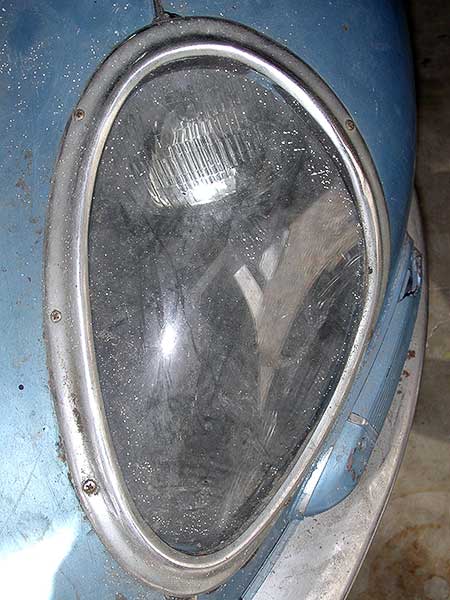
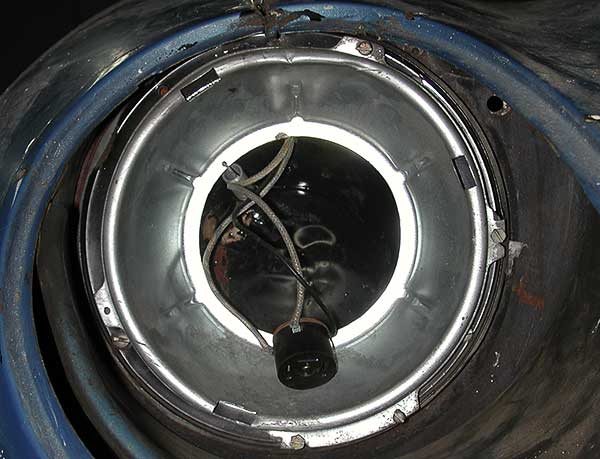
Here’s the right headlight as received —
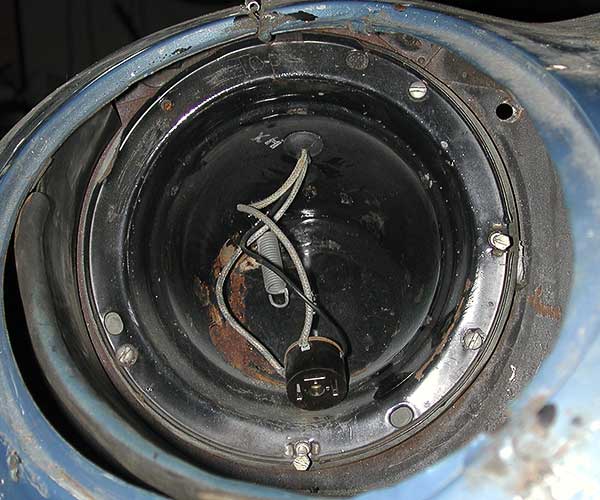
Remove the trim screws, pull off the glass & gasket, loosen the three screws holding the lamp retainer, pull the lamp & retaining ring, and you get —
Again, the trim pieces cleaned up with Nevr-Dull but have too many small pores to leave ’em as-is.
Loosen more spring-loaded screws, unhook one spring and —
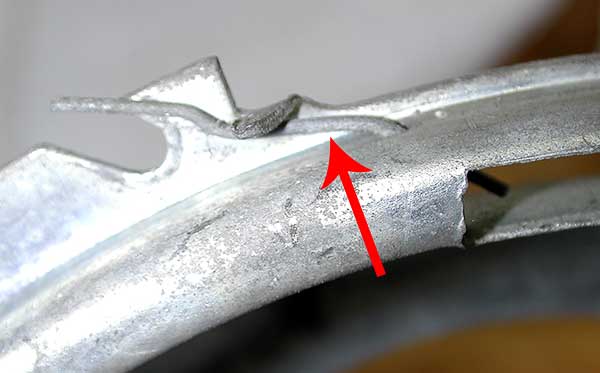
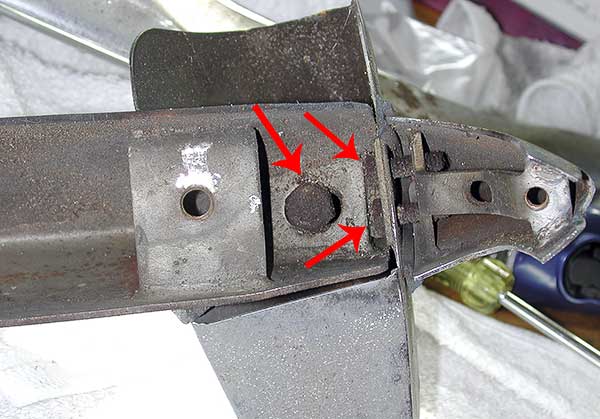
I don’t actually know what I’m doing yet. My intention here was to remove the front bumpers. To do that I have to remove the headlight “sugar scoops.” To do THAT the repair manuals are awfully vague. They all talk about three retaining screws holding the scoops. I thought they meant these, under the bonnet —
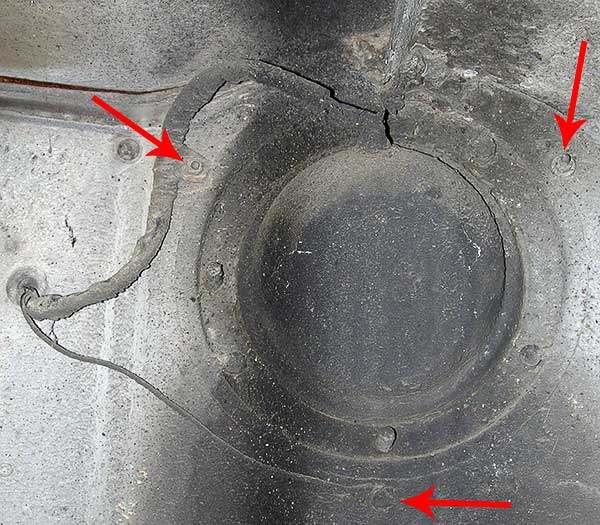
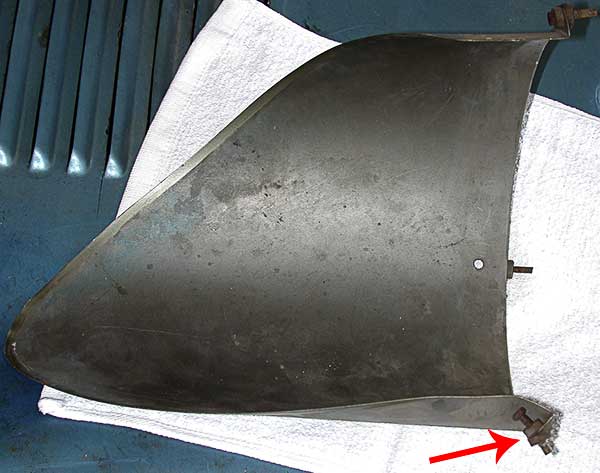
Alas that did not allow the scoop to just pop out. So I dug into the headlight area to remove everything else. Not much detail there in the manuals either. Turns out those WERE the three nuts holding the scoop. There might be prior damage or else I tweaked it myself, but here is the right scoop with an arrow pointing to the trouble —
This car has definitely been worked on before. Not everything matches up perectly. The headlight adjuster on the left side has these wire retainers for the adjusting bolt heads —
The right side did not have any. Seemed to “retain” just fine though. The right side headlight bucket (the circular part covered with sludge above) has some damage that did not photograph well (so no pic for you!). The back wall is supposed to have a smooth slope but this one has a severe wrinkle. It is exposed on the underside of the bonnet so something whacked it in the distant past.
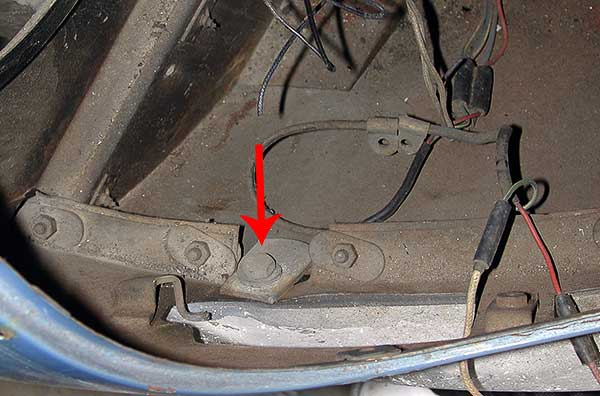
After getting the sugar scoop out here is one of the two bolts-with-plates holding the bumper.
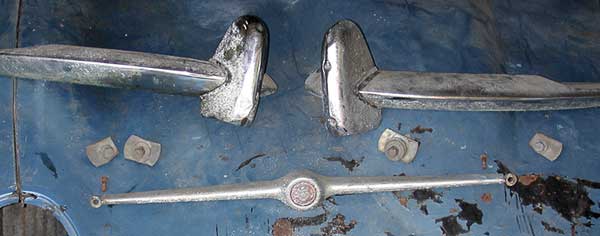
Here’s what the pieces of the bumper look like with “over-riders” still on the bumper wings.
One of the coolest items I found so far is the emblem in the center of the “motif bar.” Hey, that’s exactly what the manuals call it!
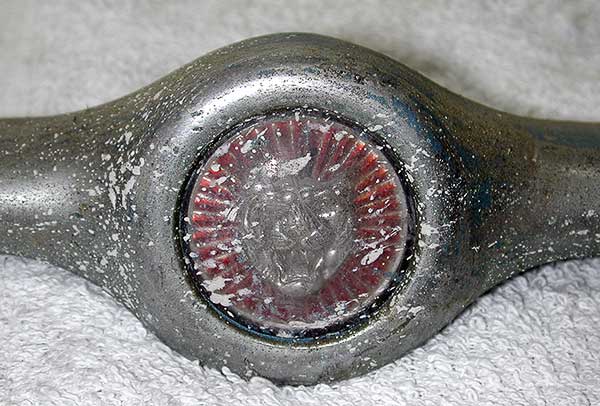
Nice kitty. I sure hope I can find a replacement because this would be a bear (jaguar?) to restore. Here’s the retaining mechanism rusted up on the backside, a spring bar, plate, and two screws.

The bumper over-riders are held on by one piece and I forgot there is yet another bit-of-bumper held on with two screws. As shown here —
Things got really weird on one bumper wing. The over-rider is normally threaded for that big bolt (or there is a welded nut I need to check again). But on the weird side there is a circular nut holding it (didn’t get a clear picture for you). No big deal right? Uh, not true! The bolt is rusted in place and there is no room or angle to get a decent vice-grip on the round nut (has a thin knurl section). I’ve got it soaking in penetrating oil now but I may end up cutting that bolt off!
The one I could remove cleaned up pretty well. Both have dings that need fixing before any rechroming.
Here are the two bumper wings, one cleaned up.
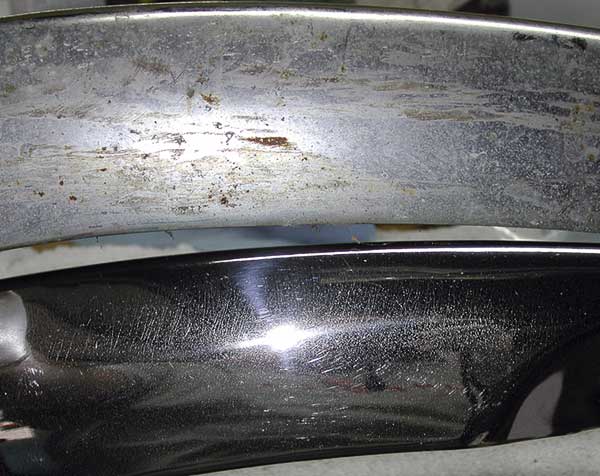
Even though these pieces are a hundred percent better than before cleaning they all really need rechroming. I sure wish dad did not apply the equivalent of Earl Scheib’s $99.95 paint job to this machine. I was scraping off blue overspray on the bumpers for hours. And the headlight sugar scoop is supposed to be the medium grey color you can vaguely see in the edges of the photo above.
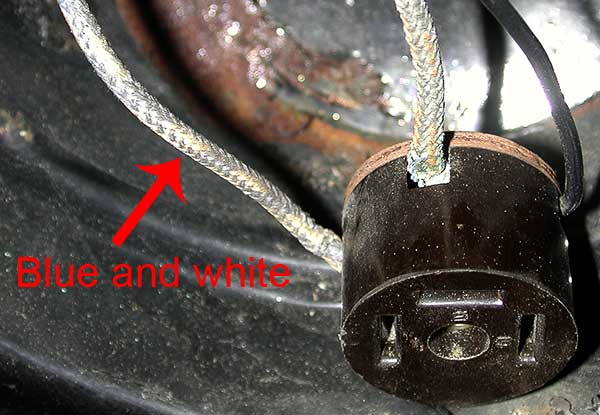
Here’s a shot of the wiring for the headlight —
I got some new toys for this restoration. Here is a vibratory bowl from Eastwood company —

I used beadblasting to remove corrosion on all the BMW R75/5’s hardware. But not only does that leave a satin finish, or rougher, but I got tired of glass grit getting in my eyes (despite using a tiny cabinet). This process promises to be less labor intensive, though it probably costs more in electricity and media.
This gets half-filled with rust cutting media, sharp green pyramids —
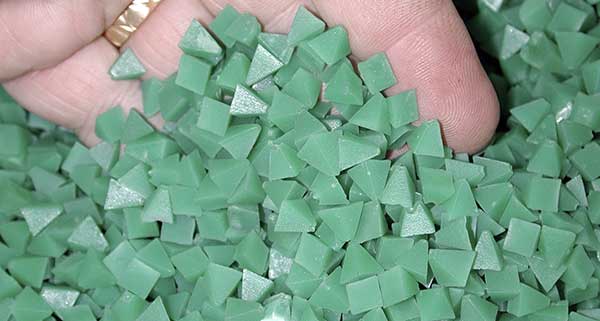
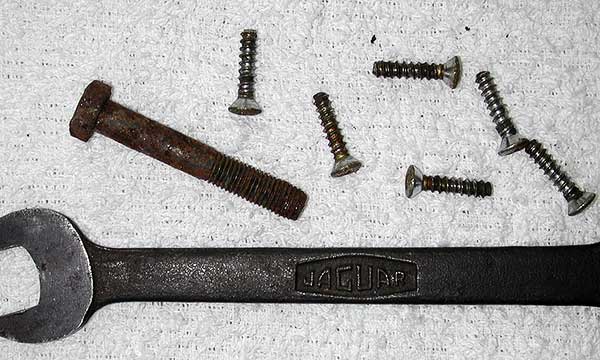
I decided to try a test lot to see how aggressive this process is. I ran the following parts dry, I believe I can run wet for faster action.
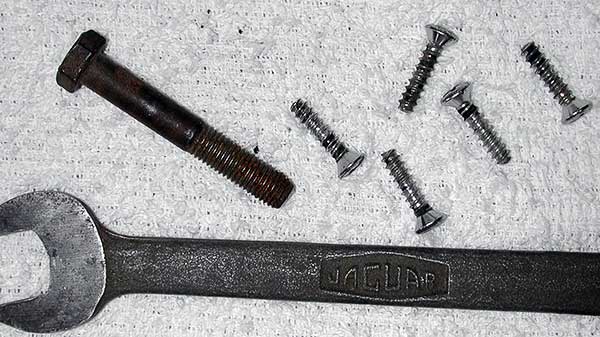
After about one and a half hours they looked like —
After four hours it looks like we’re ready to polish (corn cob or walnut shell media) if necessary —
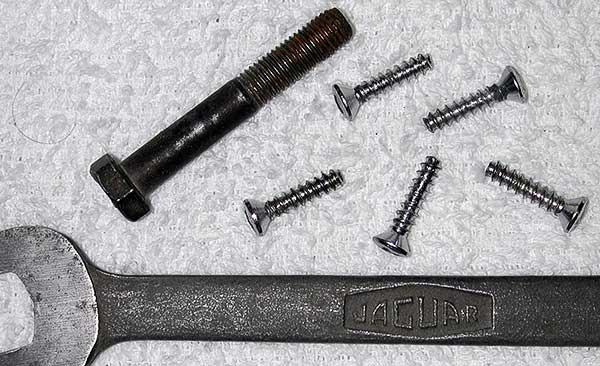
Not bad. A few observations. Parts must be degreased prior to vibrating. The media doesn’t do much to soft gunk, similar to bead blasting. Eastwood claims the bowl should not “walk” because of the soft-foot base. Yeah, in their dreams. It moves around slowly, depending on the exact surface I set it on, until it gets counter tension in the power cord. The noise is unpleasant. You can’t really box it in because the motor needs air for cooling. I need to run this when I’m out of the garage or else wear ear plugs. My air compressor is more pleasant to listen to (Sears ‘Pro’ 2 HP, not the monkey-on-crack scream of typical small compressors).
And here’s a Chinese-made (hard to avoid these days) cherry picker from Harbor Freight —
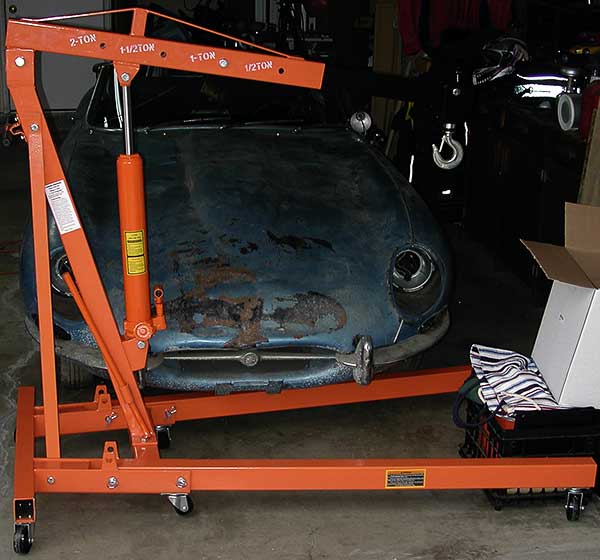
This one folds up to take up less storage room. I figure to use it to pull off the bonnet in addition to the motor & trans. This hoist took an annoying amount of time to construct. The instructions were, well, inscrutable. I can imagine the manufacturer’s customer support group editing them, “no, not illegible enough yet. Defocus some more… Ahh, that’s it. That’ll make them suffer.”
Let me leave you with another shock to my system. I knew this might be the case but hands-on it still feels wrong to reach for inch-based (Imperial, English) tools. This car was built before England converted to the metric system. Darn. I have a reasonable collection of metric tools but my English set is a bit primitive. Don’t tell me I need some Whitworth size tools? Tell me it isn’t so!

It is great that you are taking lots of phots…you will need them months from now when you reassemble the car. Label everything.
I’m glad you are “getting into” the project and sharing it with us!
I saw a tee-shirt that said”I love my Jag”…I hate my Jag…I love my Jag…I hate my Jag…” You may want to get one of those!
Comment by Paul Taylor — October 31, 2007 @ 9:34 am